


In my previous article on web services I mentioned how www.idrsolutions.com received a lot of questions about Java development. In that article I gave a brief overview of what a web service is, how they work and how to communicate with one using a simple client.
In part two of a series of articles I will show you how to create your own simple java web service.
This article will also be useful for setting up BuildVu (Our PDF to HTML5 converter) with our own BuildVu Web Service.
Getting Started
First of all, we need to set up a server to host the web service. I’m using Glassfish 4.0, which allows you to host a local server on your own machine. You can install it yourself and point your IDE in the direction of it’s installation folder. Alternatively, with NetBeans you can download and install Glassfish (amongst others) when you create the project.
Now we need to create the project, in NetBeans:
- Go to File>New Project.
- Select the Java Web category and in the adjacent window select Web Application.
- Name your project and then press next.
- Select which server you want to use e.g. GlassFish. If no servers are available click Add and select Glassfish, press next and download the server.
- Press finish.
- You may get a page created called index.html, you can close it as it’s not needed.
Creating a Web Service
in your projects window, right click the Source Packages folder, go to New and from the list Select Java Class. You can choose Web Service and it will create a fully generated web service class with some example methods. But for the time being, just create a new Java Class.
Now create a public method inside the new public method with the following code:
public String sayHello(String name){
    return "Hello " + name + "!";
}
So your class should now look something like this:
public class SimpleWebService {
    public String sayHello(String name){
        return "Hello " + name + "!";
    }
}
The layout should be familiar to you as it’s exactly like any other Java class. So how do we turn it into a web service? Add the annotation @WebService above the class, add @WebMethod above the sayHello method and import their classes.
import javax.jws.WebMethod;
import javax.jws.WebService;

@WebService
public class SimpleWebService {
    @WebMethod
    public String sayHello(String name){
        return "Hello " + name + "!";
    }
}
And now you’ve declared your java web service. It’s that simple!
Deploying the Web Service
Now that we’ve created the web service, we should see if it actually works. So to get the web service running on the server, follow these steps:
- Right click your project and select “Clean and Build”.
- After the projects been built, right click it again and select “Deploy”
The IDE will now launch an instance of Glassfish and put your web service up on it. Now we need to check that Glassfish has successfully deployed the service. To do this, we need to go to the console, which we access via a browser. Navigate to localhost:4848. Once the console is loaded, go to Applications on the sidebar.
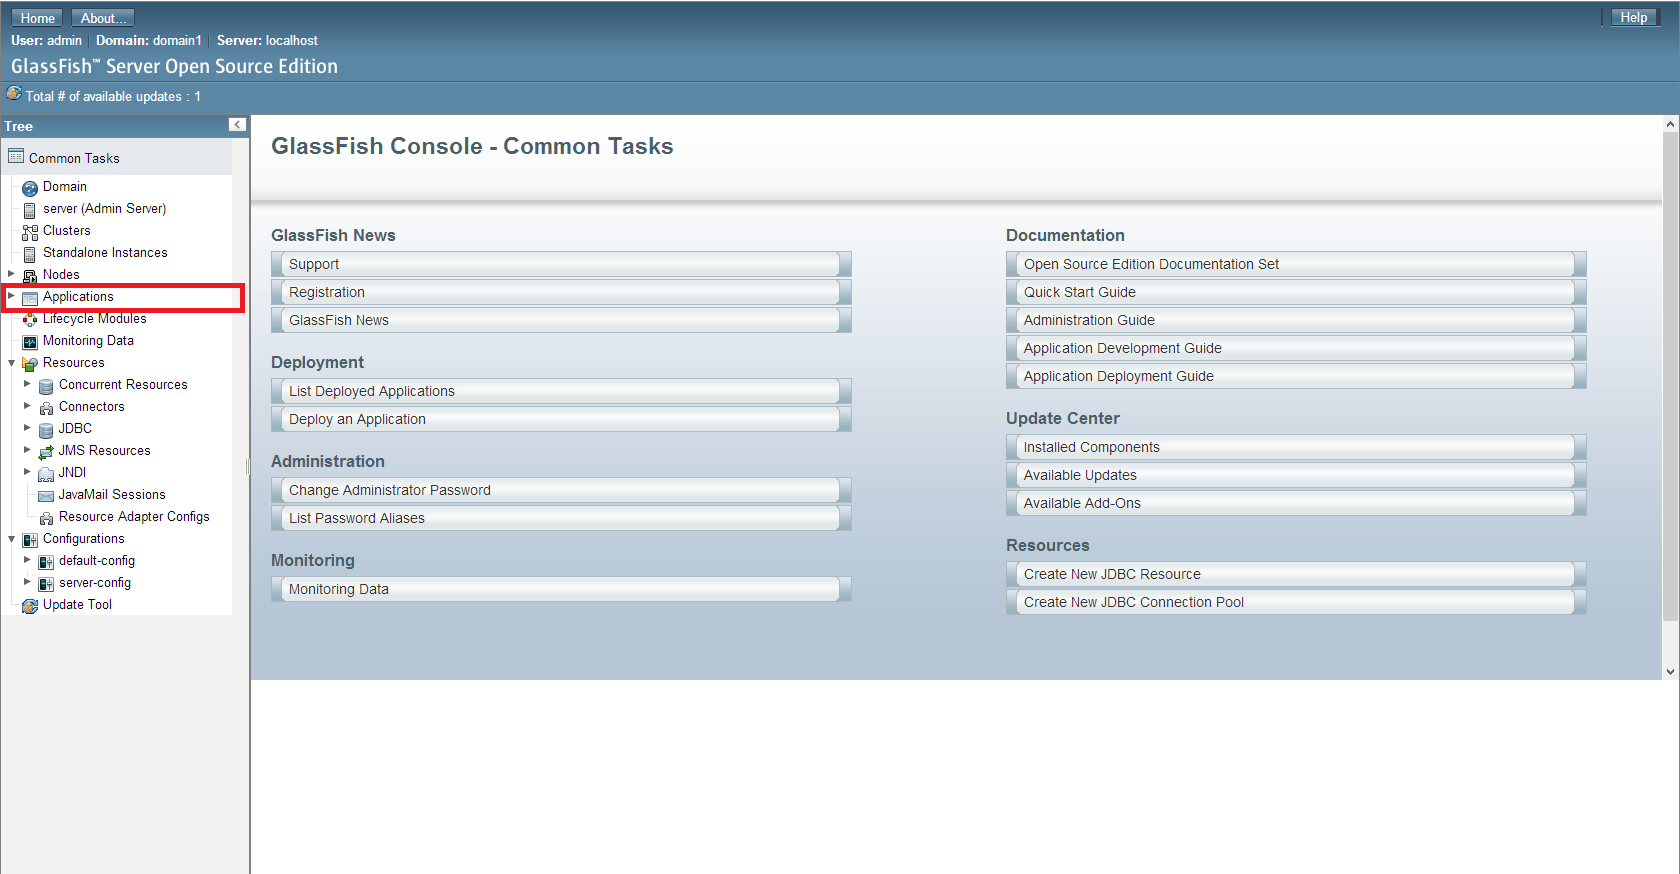
You should be able to see your java web service listed as an application.

Click on the name of the web service to open the Edit Application. On the table at the bottom find the action called “View Endpoint”.
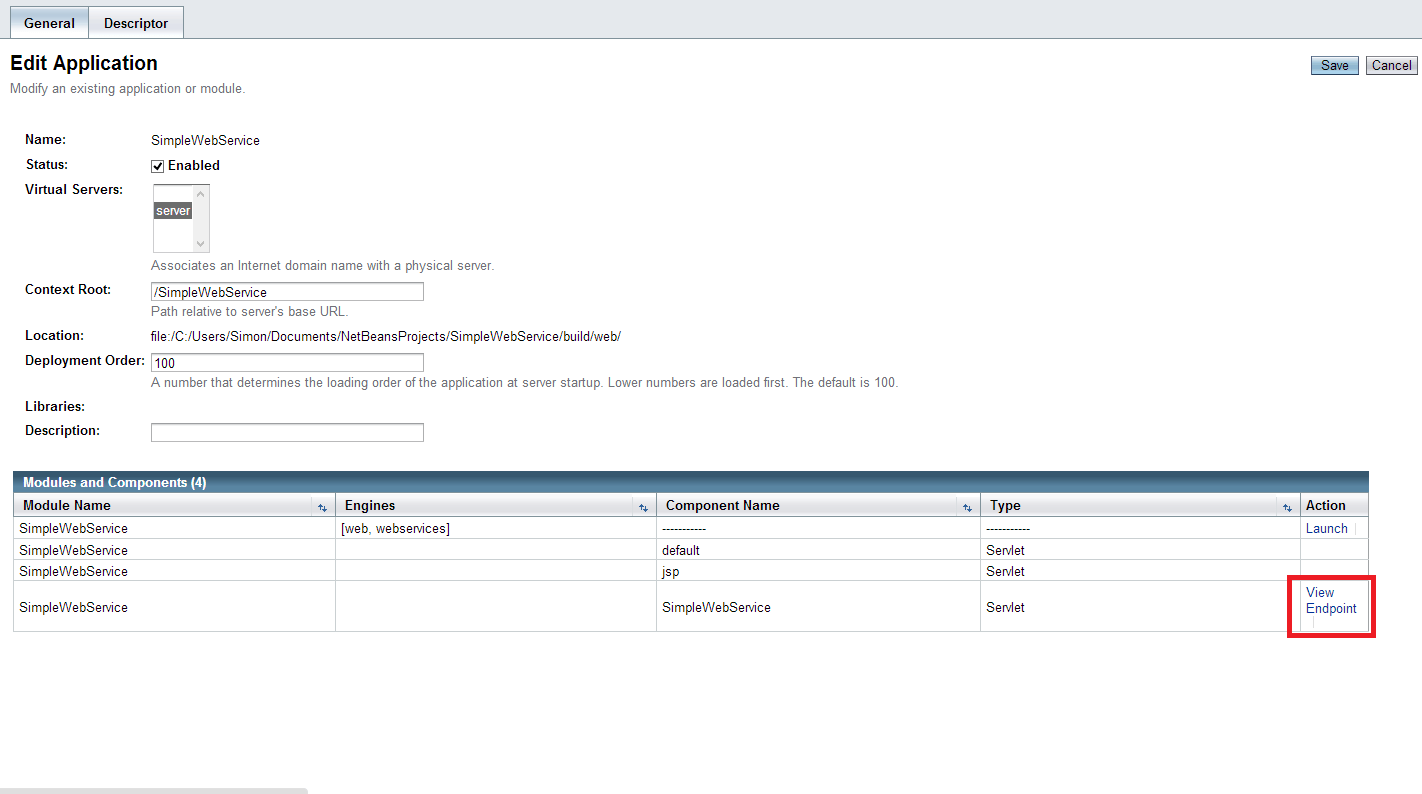
From there, we go to a page with a couple of links. The first link takes you to the previous page. The second link offers a tester utility which allows us to test the web service without the need of creating a client application, it also allows us to view the raw SOAP XML. The third one allows us to look at the actual WSDL generated for the web service.
Go to the second link (the url ending in ?Tester) and click the first link (with the port 8080). You should see the following:
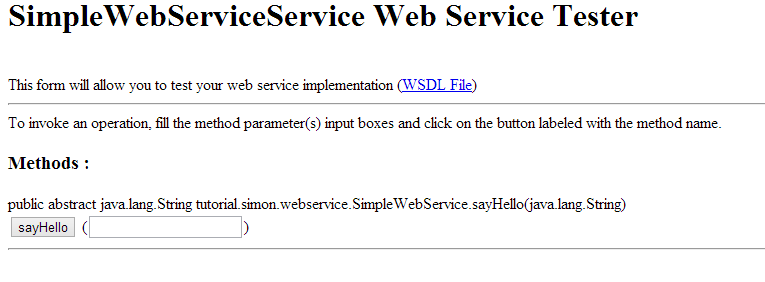
Type something into the text box and press the “sayHello” button. We can now view the SOAP request and response generated.

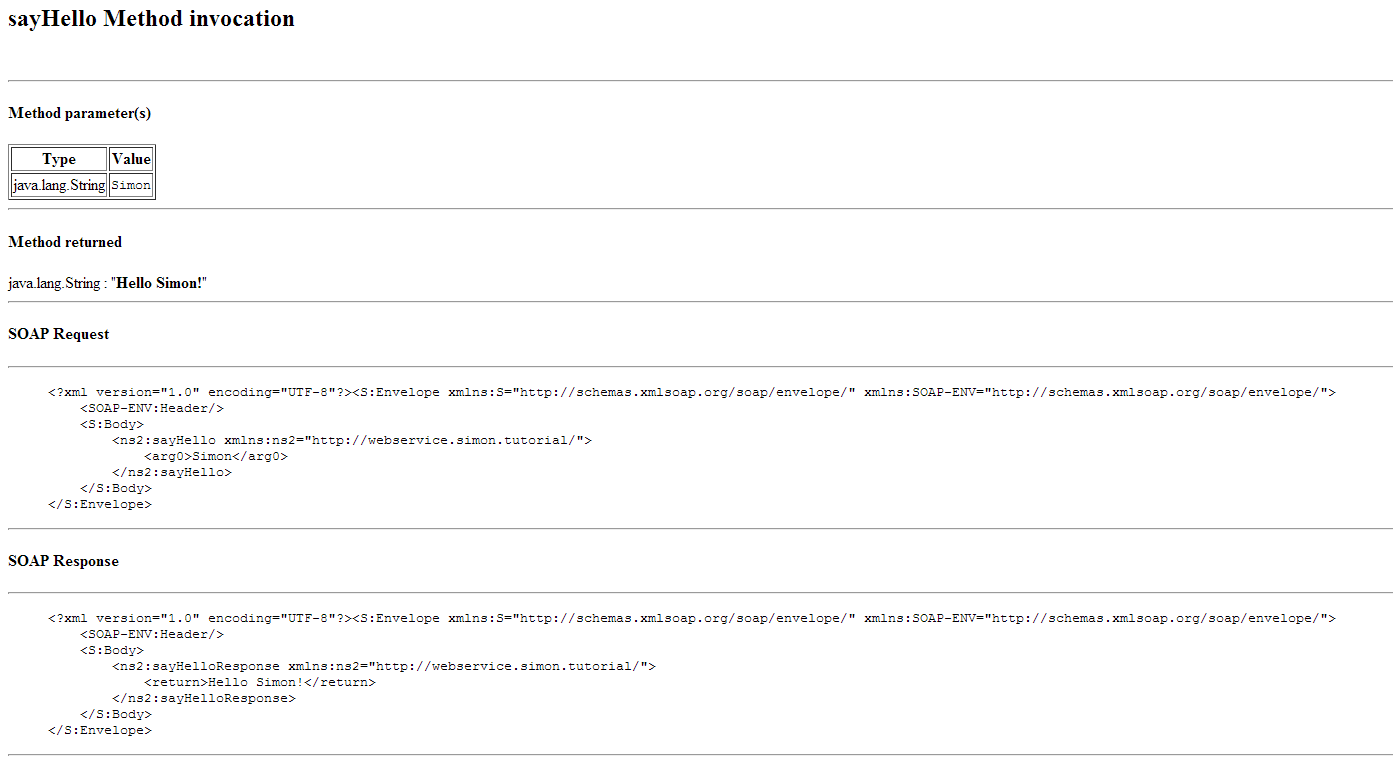
You may have noticed that the elements in the SOAP body are generic with “sayHello” and “arg0” tags. to make these look nicer, we need to add some parameters to our annotations in the java web service class.
import javax.jws.WebMethod;
import javax.jws.WebParam;
import javax.jws.WebService;

// The url will now be .../HelloService
@WebService(serviceName="HelloService")
public class SimpleWebService {
    // The method element in the XML will now be SayHello
    @WebMethod(operationName="SayHello")
    // @WebParam will rename the input from arg0 to name
    public String sayHello(@WebParam(name="name") String name){
        return "Hello " + name + "!";
    }
}
Redeploy the application and navigate back to the Tester utility, type in a vlaue and press “sayHello”, the SOAP XML should now look like this:

Conclusion
In this article I’ve covered how to create a small web service and how to do some simple testing from within Glassfish. I would like to note that putting business logic inside of your Web Service isn’t a very good practice. Instead have a class which handles interaction from the web service interface and your business classes.
I also encourage you to play around with this web service and add methods of your own. Try looking at what happens when you use Lists as parameters and return values. Also try implementing your own client, using my previous tutorial if you need any guidance.
Got any questions or comments? Feel free to post them below.