This tutorial aims to create a service that can be used to accurately convert Microsoft Office file formats into PDFs. The service works by storing the Office file in a SharePoint file storage, then requesting the file back in a specified format using this API call:
https://docs.microsoft.com/en-us/graph/api/driveitem-get-content-format?view=graph-rest-beta&tabs=http, before deleting the file again (saving space on the SharePoint).
This implementation majorly follows/borrows/steals from https://medium.com/medialesson/convert-files-to-pdf-using-microsoft-graph-azure-functions-20bc84d2adc4, however has been re-implemented in Java using the Microsoft Graph SDK.
The code produced in this guide can be found on GitHub and is explained in detail in the Project Setup section.
App Registration
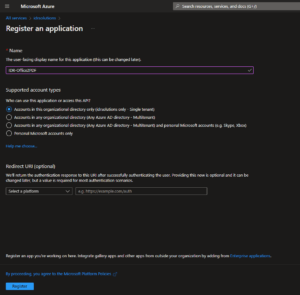
The first thing we need to do is create an app registration, which we will use for login information and permissions for our app.
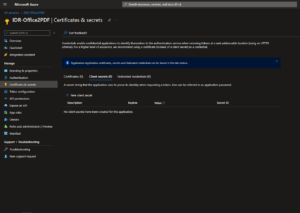
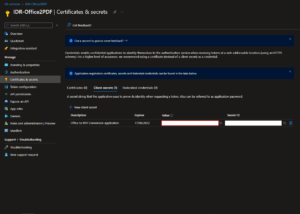
Secret Key
Azure Portal -> Azure Active Directory -> App registrations
Permissions
The last thing we need to do is set up the application’s permissions. We need to configure the application to be allowed to write files so that we can upload our office files in order to then download them in the correct format.
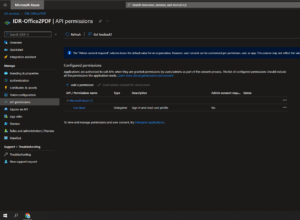
Navigate to the app permissions page inside the application registration.
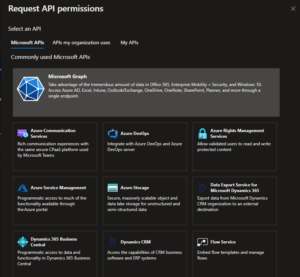
Click “Add a permission”, then, in the menu that appears, select the Microsoft Graph API.
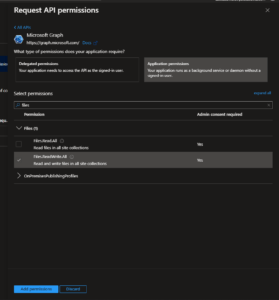
Then Application permissions.
Then search for files, open the submenu, and select “Files.ReadWrite.All”.
Click the “Add permissions” button, then, back on the “API permissions” page, click the “Grant admin consent for X” button. If you cannot click this button (note it does take a moment to become available after adding a new permission), then you’ll need to get an admin account to navigate to this page and click it for you.
Download as a PDF
In order to download a file as a PDF, we need somewhere to upload it first. For this, we’re going to piggyback off of SharePoint.
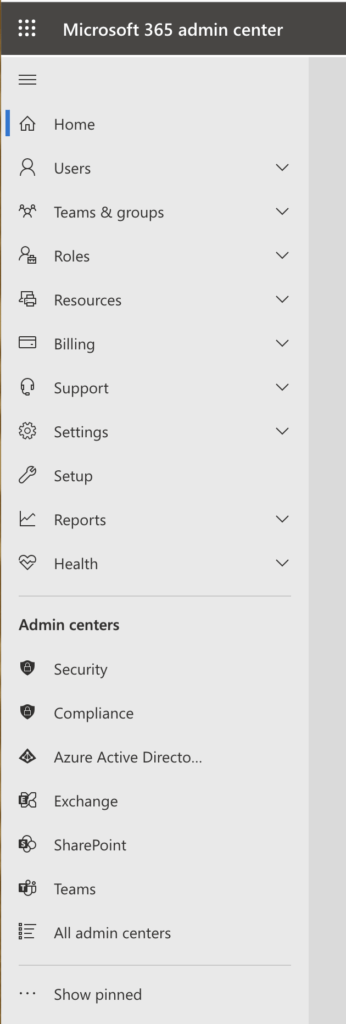
We want to create a SharePoint site that isn’t linked to any group, to do this, navigate to https://www.office.com, open the admin panel then the SharePoint tab.
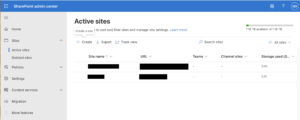
Go to sites -> Active Sites, then click create.
In the menu that pops up, click “Other Options”, then select the “document center” template (the template probably doesn’t matter, but this one has a nice list of any files that remain on the server if they fail to delete). Finally, set a name and note this down, you’ll need it in the next step.
With the site created, we need its ID in order to make API calls using it. We can find this ID by navigating to https://developer.microsoft.com/en-us/graph/graph-explorer, signing in using the same account that was set as an administrator to the SharePoint site, setting the URL to
https://graph.microsoft.com/v1.0/sites/YOUR-DOMAIN.sharepoint.com/:/sites/YOUR-SITE-NAME/?$select=id
replacing “YOUR-SITE-NAME” with the name of the site that you set in the previous step, and “YOUR-DOMAIN” to your SharePoint domain, and executing the query
After executing the query, you should get a response that looks like this:
Take note of the ID, we will use this for uploading to and downloading from the SharePoint.
Project setup
To create the project, azure offers a lovely archetype which sets up the scaffolding of the project for us. More information can be found here:
https://docs.microsoft.com/en-us/azure/azure-functions/functions-reference-java
To create your project, run the following command:
mvn archetype:generate -DarchetypeGroupId=com.microsoft.azure -DarchetypeArtifactId=azure-functions-archetype
This will run interactively, asking for a groupId, artifactId, version, etc. Fill these in, then open the resulting project.
You should delete the files in /src/test, as we’re going to make some changes that will break these tests, which would prevent the Maven build from finishing.
Additional dependencies
Add the following to the dependencies section of your pom:
<dependency>
    <groupId>com.microsoft.graph</groupId>
    <artifactId>microsoft-graph</artifactId>
    <version>5.22.0</version>
</dependency>

<dependency>
    <groupId>com.azure</groupId>
    <artifactId>azure-identity</artifactId>
    <version>1.5.0</version>
</dependency>

<dependency>
    <groupId>com.google.code.gson</groupId>
    <artifactId>gson</artifactId>
    <version>2.9.0</version>
</dependency>
Local Settings
"graph:TenantId": "YOUR-TENANT-ID",
"graph:ClientId": "YOUR-APPLICATION-CLIENT-ID",
"graph:ClientSecret": "YOUR-APPLICATION-CLIENT-SECRET",
"pdf:SiteId": "YOUR-SHAREPOINT-SITE-ID"
MimeMap
Create a class called MimeMap and add the following to it:
public class MimeMap {
    // The map between extensions and Mimetypes
    private static final HashMap<String, String> map = new HashMap<>();

    static {
        // Add each office file extension and it's mimetype to the map
        // The source of these mappings can be found here: https://stackoverflow.com/a/4212908
        map.put("doc", "application/msword");
        map.put("dot", "application/msword");

        map.put("docx", "application/vnd.openxmlformats-officedocument.wordprocessingml.document");
        map.put("dotx", "application/vnd.openxmlformats-officedocument.wordprocessingml.template");
        map.put("docm", "application/vnd.ms-word.document.macroEnabled.12");
        map.put("dotm", "application/vnd.ms-word.template.macroEnabled.12");

        map.put("xls", "application/vnd.ms-excel");
        map.put("xlt", "application/vnd.ms-excel");
        map.put("xla", "application/vnd.ms-excel");

        map.put("xlsx", "application/vnd.openxmlformats-officedocument.spreadsheetml.sheet");
        map.put("xltx", "application/vnd.openxmlformats-officedocument.spreadsheetml.template");
        map.put("xlsm", "application/vnd.ms-excel.sheet.macroEnabled.12");
        map.put("xltm", "application/vnd.ms-excel.template.macroEnabled.12");
        map.put("xlam", "application/vnd.ms-excel.addin.macroEnabled.12");
        map.put("xlsb", "application/vnd.ms-excel.sheet.binary.macroEnabled.12");

        map.put("ppt", "application/vnd.ms-powerpoint");
        map.put("pot", "application/vnd.ms-powerpoint");
        map.put("pps", "application/vnd.ms-powerpoint");
        map.put("ppa", "application/vnd.ms-powerpoint");

        map.put("pptx", "application/vnd.openxmlformats-officedocument.presentationml.presentation");
        map.put("potx", "application/vnd.openxmlformats-officedocument.presentationml.template");
        map.put("ppsx", "application/vnd.openxmlformats-officedocument.presentationml.slideshow");
        map.put("ppam", "application/vnd.ms-powerpoint.addin.macroEnabled.12");
        map.put("pptm", "application/vnd.ms-powerpoint.presentation.macroEnabled.12");
        map.put("potm", "application/vnd.ms-powerpoint.template.macroEnabled.12");
        map.put("ppsm", "application/vnd.ms-powerpoint.slideshow.macroEnabled.12");

        map.put("mdb", "application/vnd.ms-access");
    }

    public static String getMimeType(String extension) {
        return map.get(extension);
    }

    public static boolean checkOfficeMimeType(String mimeType) {
        return map.containsValue(mimeType);
    }

    public static String getExtension(String mimeType) {
        Optional<Map.Entry<String, String>> extension = map.entrySet().stream().filter((entry) -> entry.getValue().equals(mimeType)).findFirst();

        return extension.map(Map.Entry::getKey).orElse(null);
    }
}
File Service
File Service: Client
private static final GraphServiceClient<Request> graphClient = GraphServiceClient
        .builder()
        .authenticationProvider(
                new TokenCredentialAuthProvider(
                        new ClientSecretCredentialBuilder()
                                .clientId(System.getenv("graph:ClientId"))
                                .clientSecret(System.getenv("graph:ClientSecret"))
                                .tenantId(System.getenv("graph:TenantId"))
                                .build()
                )
        )
.buildClient();/**
* Get a DriveItemRequestBuilder already at the root of the configured sharepoint site
* @return A DriveItemRequestBuilder at the site root
*/
private static DriveItemRequestBuilder getSharepointSiteRoot() {
return graphClient
.sites(System.getenv("pdf:SiteId"))
.drive()
.root();
}File Service: File Upload
/**
 * Uploads the given file to the given sharepoint storage
 * @param content An input stream of the file being uploaded
 * @param contentLength The length in bytes of the file being uploaded
 * @param contentType The Mimetype of the file being uploaded
 * @return The id of the file in the sharepoint storage
 * @throws IOException when the upload fails
 * @throws ClientException when the post request fails
 */
public static String uploadStream(ExecutionContext context, InputStream content, long contentLength, String contentType) throws ClientException, IOException {
    String fileName = UUID.randomUUID() + "." + MimeMap.getExtension(contentType);

    IProgressCallback callback = (current, max) ->
            context.getLogger().info(String.format("Uploaded %d of %d bytes", current, max));

    DriveItemCreateUploadSessionParameterSet uploadParams = DriveItemCreateUploadSessionParameterSet
            .newBuilder()
            .withItem(new DriveItemUploadableProperties())
            .build();

    UploadSession session = getSharepointSiteRoot()
            .itemWithPath(fileName)
            .createUploadSession(uploadParams)
            .buildRequest()
            .post();

    LargeFileUploadTask<DriveItem> largeFileUploadTask = new LargeFileUploadTask<>(
            session,
            graphClient,
            content,
            contentLength,
            DriveItem.class);

    LargeFileUploadResult<DriveItem> result = largeFileUploadTask.upload(0, null, callback);

    if (result.responseBody != null) {
        return result.responseBody.id;
    }

    return null;
}
File Service: File Download
/**
 * Download the file with the given fileId in the targetFormat
 * @param fileId The ID of the file to download
 * @param targetFormat The target format to download the file in
 * @return a byte array containing the converted file
 * @throws ClientException when the graph api request failsw
 * @throws IOException when the converted file cannot be read from the response
 */
public static byte[] downloadConvertedFile(String fileId, String targetFormat) throws IOException, ClientException {
    // It seems that the Java API is lacking a proper download function for items, we will need to make a custom request for the resource
    try (
            InputStream stream = graphClient
                .customRequest("/sites/" + System.getenv("pdf:SiteId") + "/drive/items/" + fileId + "/content", InputStream.class)
                .buildRequest(new QueryOption("format", targetFormat))
                .get()
    ) {
        if (stream != null) {
            return stream.readAllBytes();
        }

        throw new IOException("Failed to read file from response");
    }
}
File Service: File Deletion
/**
 * Delete the file with the given fileId
 * @param fileId The ID of the file to delete
 * @throws ClientException when the graph api request fails
 */
public static void deleteFile(String fileId) throws ClientException {
    DriveItem item = getSharepointSiteRoot()
            .itemWithPath(fileId)
            .buildRequest()
            .delete();

    System.out.println(item.deleted.state);
}
Putting it All Together
First we need to make sure to set the value of the FunctionName annotation to a more appropriate value, then we want to set the HttpTrigger annotation to only listen to the POST HTTP method, have a binary data type, and a route of convert.
Finally, we want to get the file from the request, do some error checking, and run our upload, download, and delete functions.
public class Function {
    @FunctionName("Office2PDF")
    public HttpResponseMessage run(
            @HttpTrigger(
                name = "req",
                route = "convert",
                methods = {HttpMethod.POST},
                authLevel = AuthorizationLevel.ANONYMOUS,
                dataType = "binary")
                HttpRequestMessage<Optional<byte[]>> request,
            final ExecutionContext context) {
        context.getLogger().info("Java HTTP trigger processed a request.");

        if (request.getBody().isEmpty()) {
            return request.createResponseBuilder(HttpStatus.BAD_REQUEST).body("File must be attached to request").build();
        }

        byte[] body = request.getBody().get();

        // In order for this to accept a raw file, the content type needs to be "application/octet-stream", however, we
        // still need rely on the content type of the original file, thus we need it delivered separately
        String mimeType = request.getHeaders().get("content-type-actual");

        if (mimeType == null || mimeType.isEmpty()) {
            return request.createResponseBuilder(HttpStatus.UNSUPPORTED_MEDIA_TYPE).body("Please provide the file's mime-type in the header with the key: Content-Type-Actual").build();
        } else if (!MimeMap.checkOfficeMimeType(mimeType)) {
            return request.createResponseBuilder(HttpStatus.UNSUPPORTED_MEDIA_TYPE).body("Content-Type-Actual must be a valid office type").build();
        }

        String fileId = null;

        try (InputStream stream = new ByteArrayInputStream(body)) {
            fileId = FileService.uploadStream(context, stream, body.length, mimeType);
            byte[] pdf = FileService.downloadConvertedFile(fileId, "pdf");

            return request.createResponseBuilder(HttpStatus.OK).body(pdf).build();
        } catch (IOException | ClientException e) {
            context.getLogger().warning(e.getMessage());
            return request.createResponseBuilder(HttpStatus.INTERNAL_SERVER_ERROR).body(e.getMessage()).build();
        } finally {
            // Since we can exit early during the conversion, we need to make sure that if a file was created, it gets
            // deleted, successful conversion or not
            if (fileId != null) {
                try {
                    FileService.deleteFile(path, fileId);
                } catch (ClientException e) {
                    context.getLogger().warning(e.getMessage());
                }
            }
        }
    }
}
Note: in order for azure functions to accept the file as a binary file, the Content-Typeheader must be set to “application/octet-stream”, as we still need to know the filetype, we also pass that in a second header: Content-Type-Actual.
Note: We delete the file in a finally statement to ensure that it gets deleted even if we fail to convert it
The full code can be found here: https://github.com/idrsolutions/azure-office-conversion
Testing
mvn azure-functions:run
Pushing to azure
mvn clean package
mvn azure-functions:deploy
Finishing up on azure
Azure -> Functions app -> Your function name
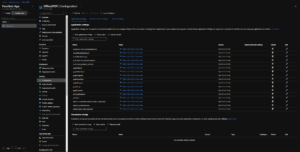
"graph:TenantId": "YOUR-TENANT-ID",
"graph:ClientId": "YOUR-APPLICATION-CLIENT-ID",
"graph:ClientSecret": "YOUR-APPLICATION-CLIENT-SECRET",
"pdf:SiteId": "YOUR-SHAREPOINT-SITE-ID"
Our software libraries allow you to
| Convert PDF files to HTML |
| Use PDF Forms in a web browser |
| Convert PDF Documents to an image |
| Work with PDF Documents in Java |
| Read and write HEIC and other Image formats in Java |
