At IDR Solutions I spend some of my time working with JPedal (our PDF Viewer which uses both Swing and JavaFX to provide some sophisticated viewing modes). Using my expertise and knowledge I decided that I will show you how to use a Scene Builder in conjunction with the NetBeans IDE to create a JavaFX GUI.
Scene Builder by default does not come with the NetBeans IDE. You can get Scene Builder from here. You can also get the NetBeans IDE from here if you do not already have it.
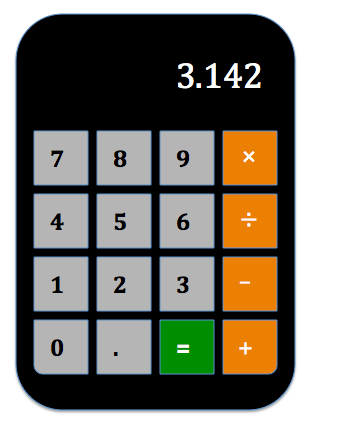
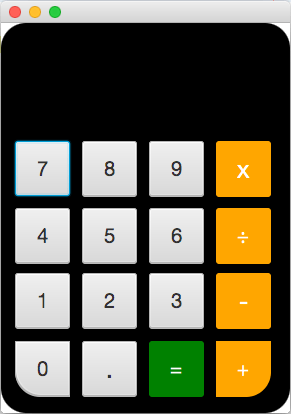
Objective: We are going to design a simple calculator to look like the figure below.
Linking Scene Builder to NetBeans.
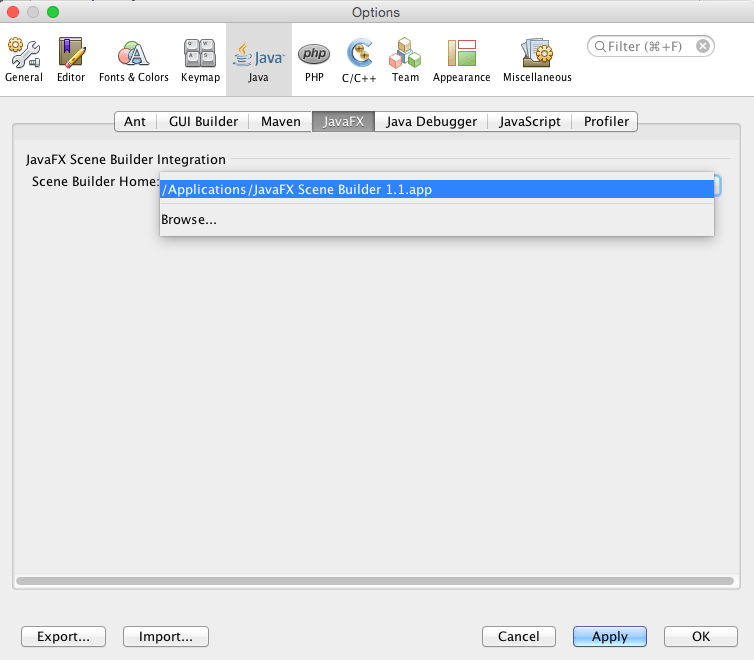
Since Scene Builder does not come bundled with NetBeans, we need to link it to NetBeans in order for it to work.
To do this,
- On Windows go to Tools -> Options -> Java -> JavaFX
- On MAC go to NetBeans -> Preferences -> Java -> JavaFX
See fig Below
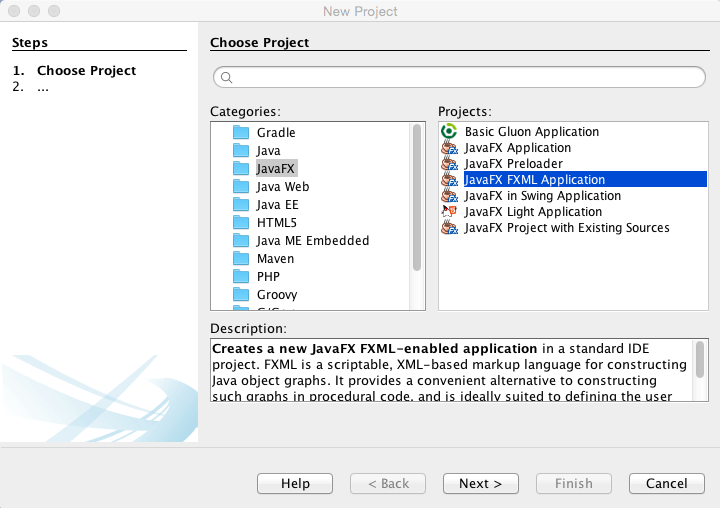
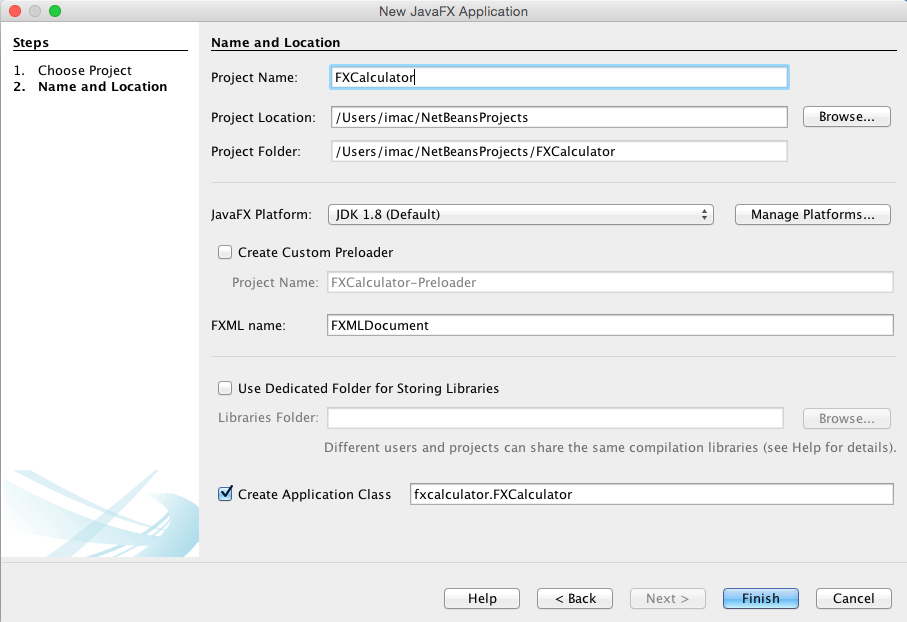
Now open NetBeans and create a new JavaFX FXML Application.

At this stage you should see the Scene Builder open.
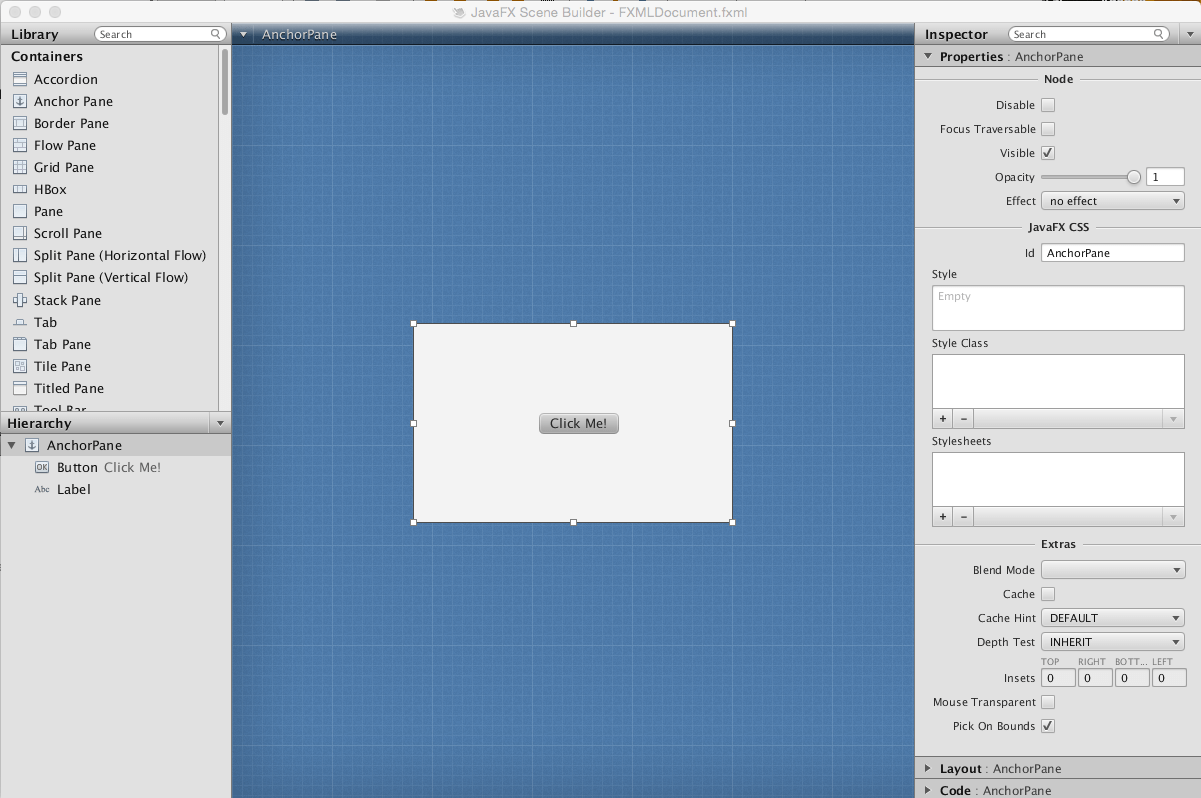
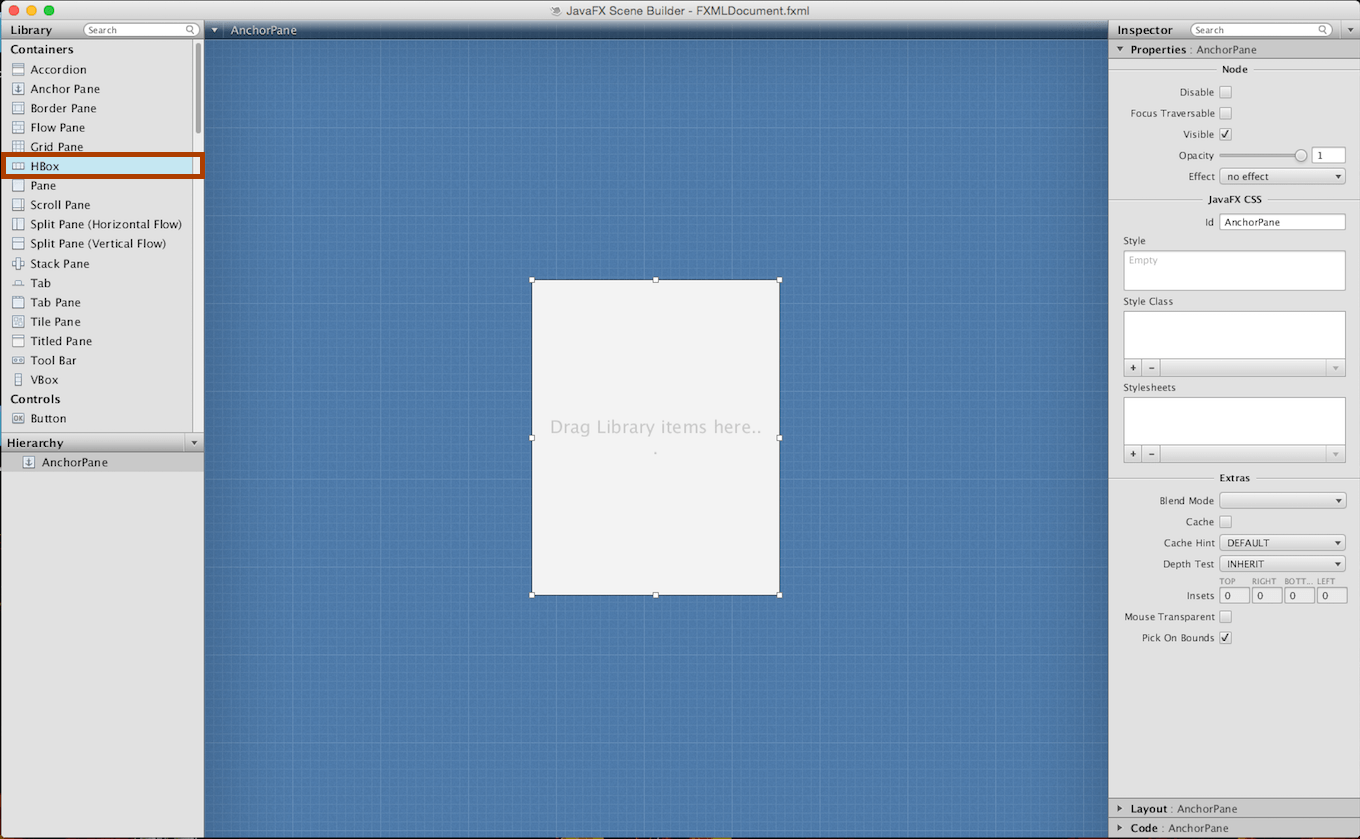
Double click on the FXMLDocument file and edit it as below.
This is how the document should look.
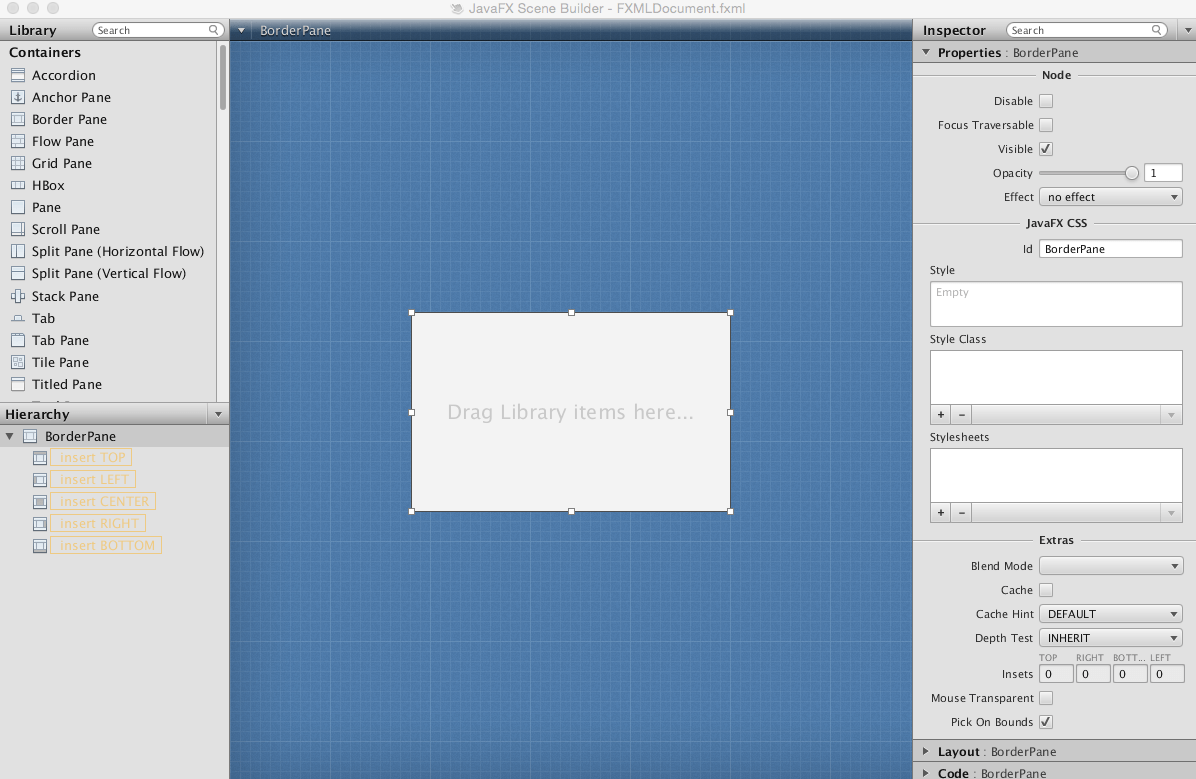
Edit it so it looks like this
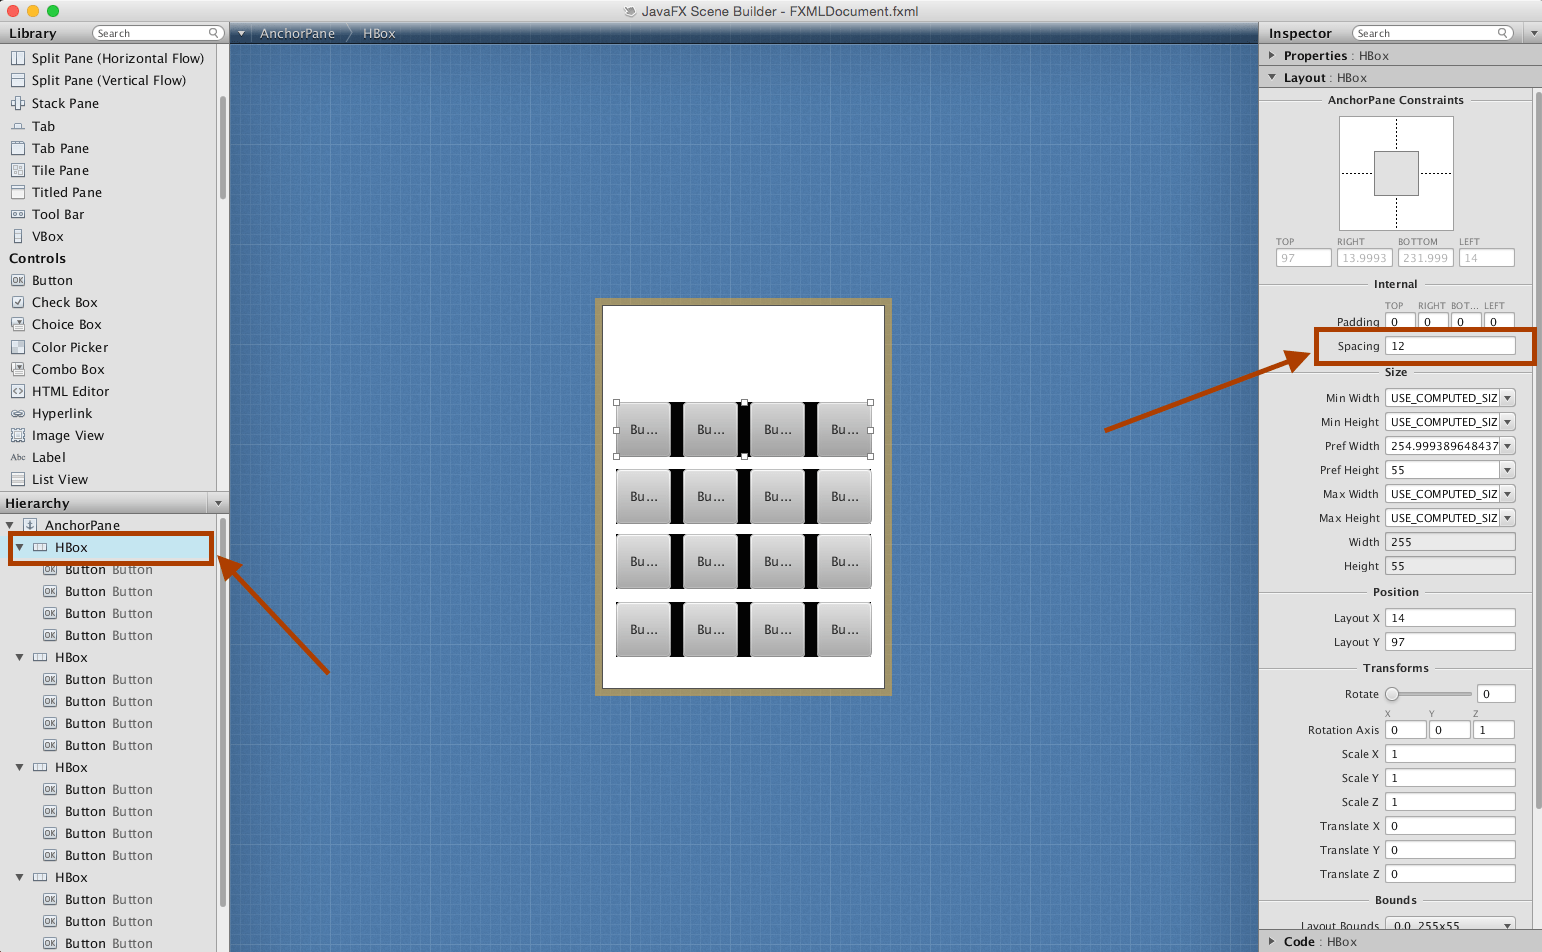
Now save the document. Your Scene Builder should be looking like this.

-fx-background-color:black; and save.See the JavaFX CSS Reference guide for details.

Time to add the buttons to the Calculator.
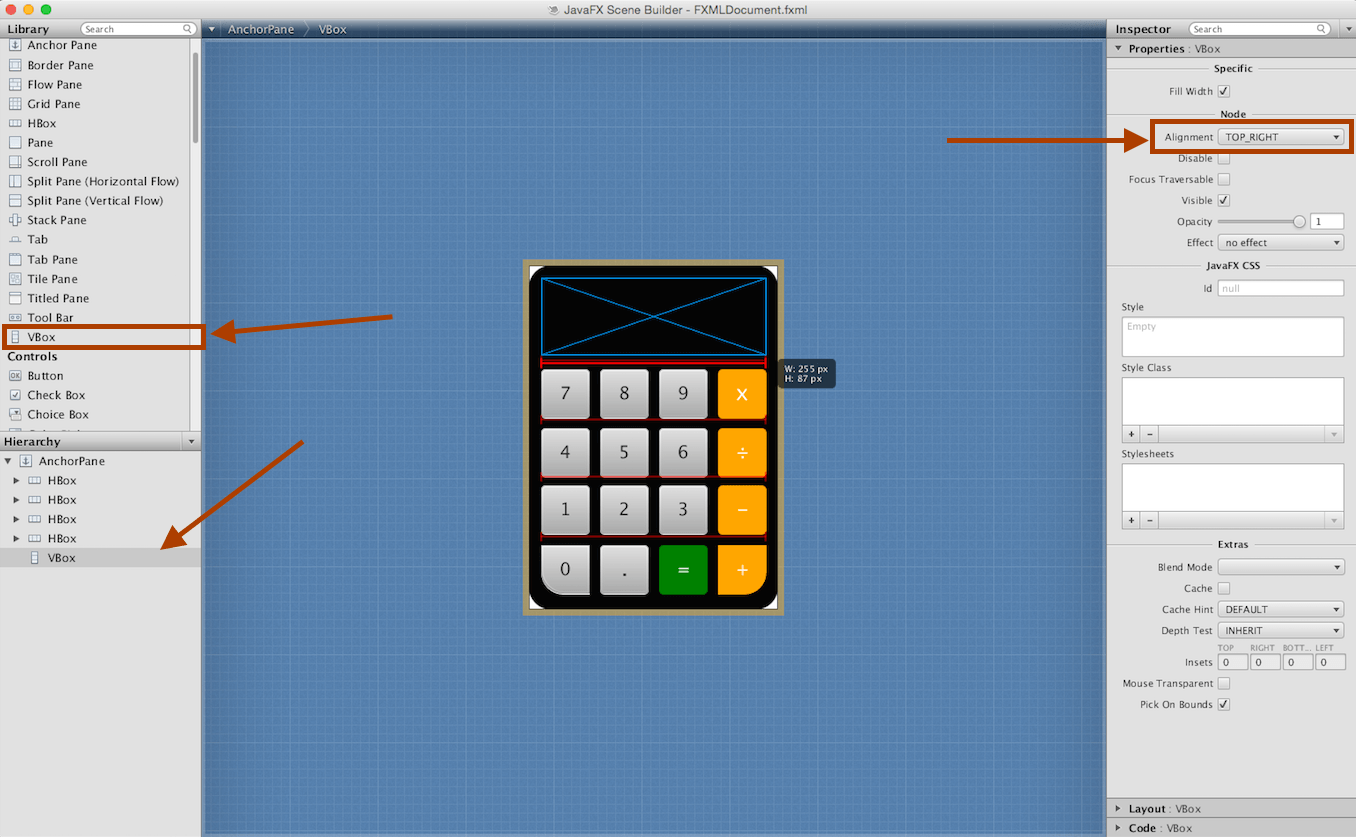
As we added the the the HBoxes to the AnchorPane, same will we add the buttons to the HBoxes.Drag One Button from the Control Panel to the HBox.Size it to your preferred size by dragging the button left corner of the button. Once done right click on the button and select duplicate. Do this to all four HBoxes.

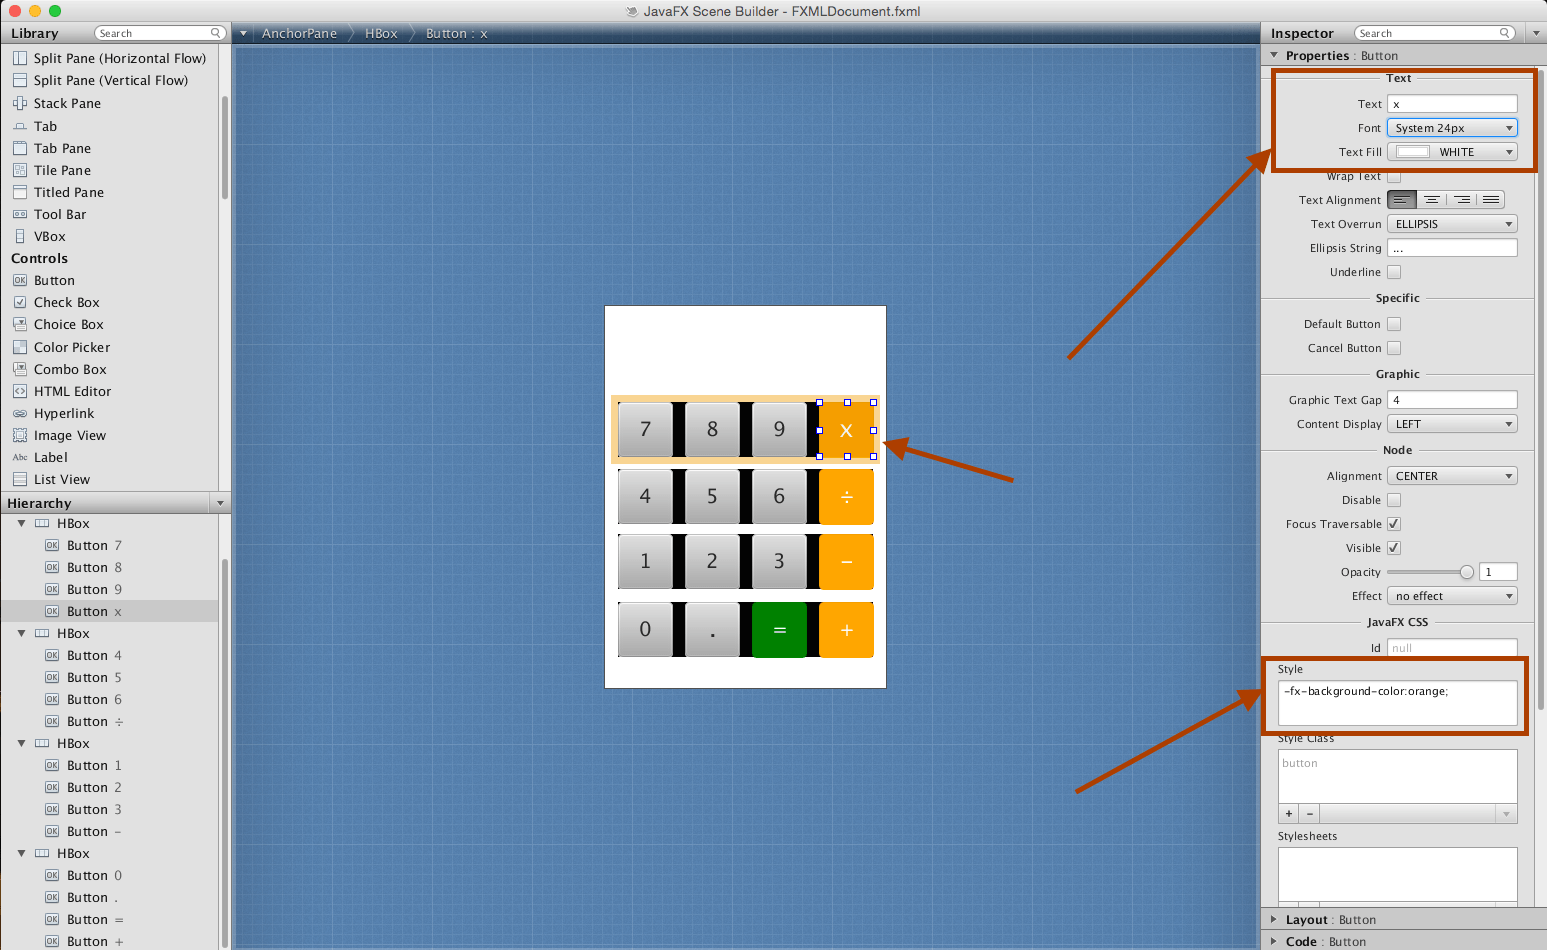
Click on the button you want to edit, on the left side of the Scene Builder, select properties and edit the button properties as preferred.
-fx-background-color:black;
-fx-background-radius: 25;
-fx-padding: 10;
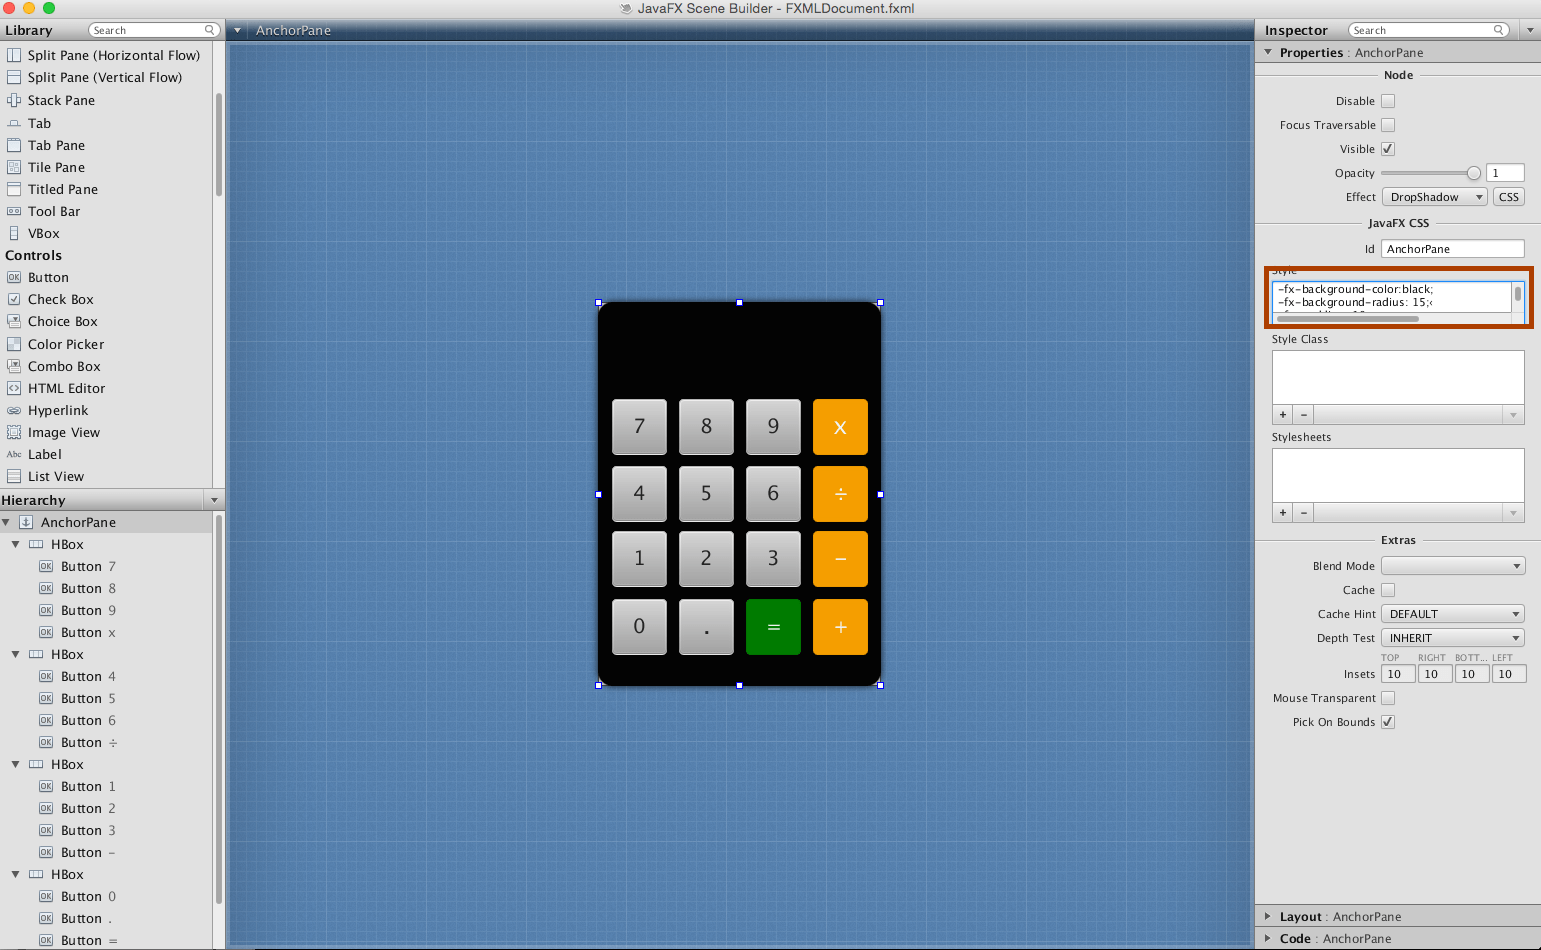
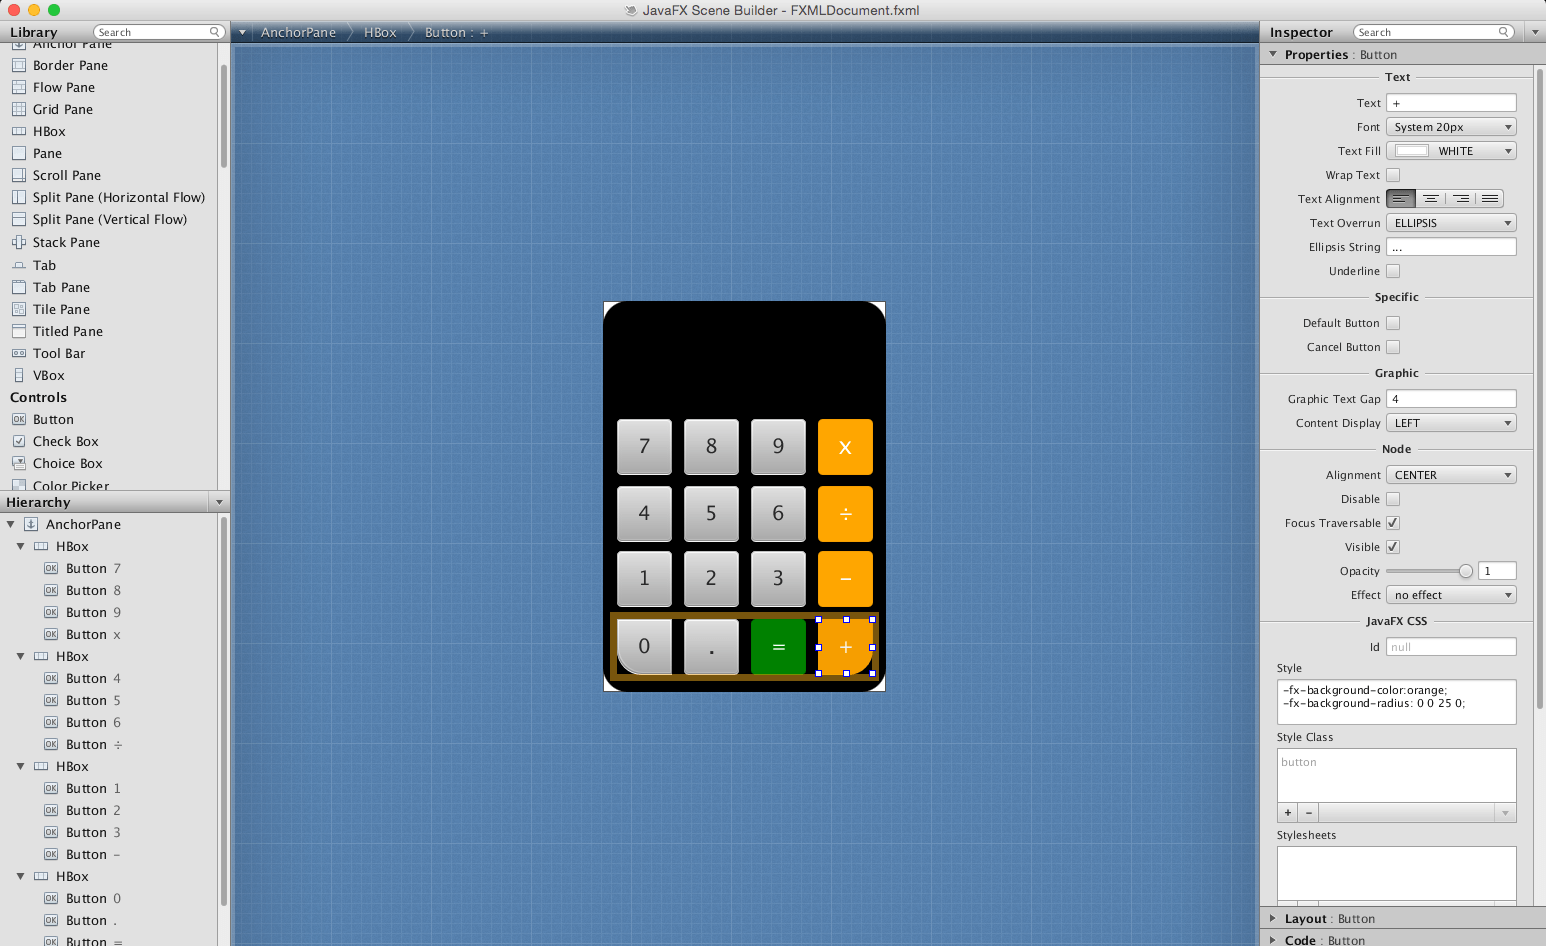
Let’s now style out our Zero and Add buttons. Click on the Zero button and add the code to the style textArea
-fx-background-radius: 0 0 0 25;. Add this to the Add button-fx-background-radius: 0 0 25 0;Your calculator should be looking like this
Now we are in a position run our program. Save your design in Scene Builder and lets dive into NetBeans.
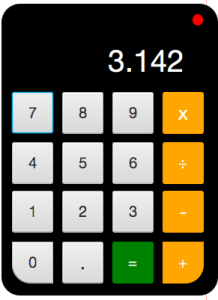
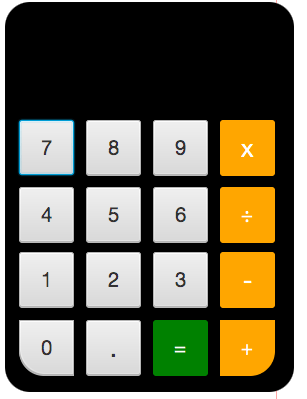
In your FXMLDocument.fxml you can see the generated code from the Scene Builder. Clean and Build your project and run it. you should see something like this.
stage.initStyle(StageStyle.TRANSPARENT); and also change the scene code to Scene scene = new Scene(root,Color.TRANSPARENT); so your class look like this
public class FXCalculator extends Application {

    @Override
    public void start(Stage stage) throws Exception {
        stage.initStyle(StageStyle.TRANSPARENT);
        Parent root = FXMLLoader.load(getClass().getResource("FXMLDocument.fxml"));

        Scene scene = new Scene(root,Color.TRANSPARENT);

        stage.setScene(scene);

        stage.show();
    }

    /**
     * @param args the command line arguments
     */    public static void main(String[] args) {
        launch(args);
    }

}

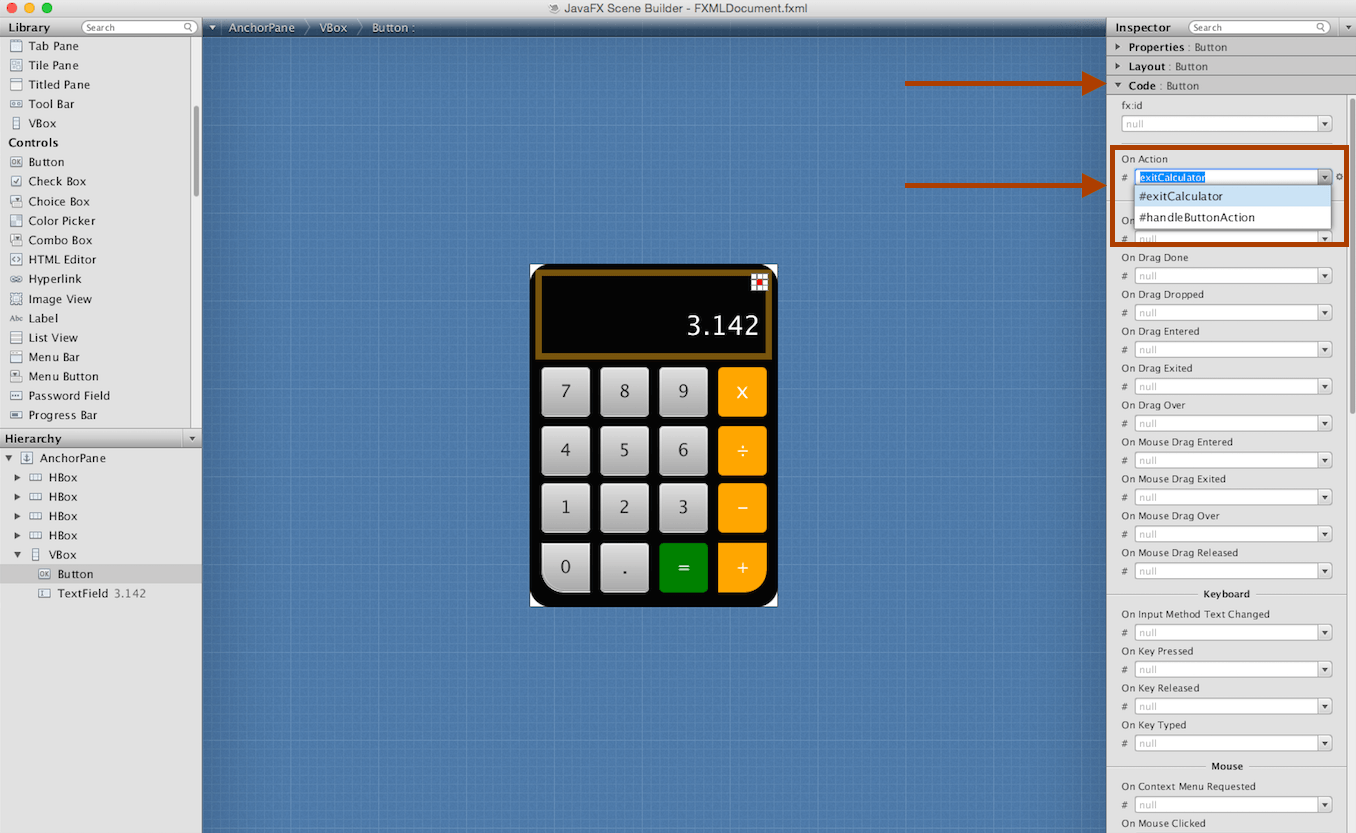
exitCalculator() this method will be called every time the close button is clicked. we will link this method to the button in the scene builder.
package fxcalculator;

import java.net.URL;
import java.util.ResourceBundle;
import javafx.event.ActionEvent;
import javafx.fxml.FXML;
import javafx.fxml.Initializable;

public class FXMLDocumentController implements Initializable {


    @FXML
    private void handleButtonAction(ActionEvent event) {

    }

    @FXML
    private void exitCalculator(){
       System.exit(1);
    }

    @Override
    public void initialize(URL url, ResourceBundle rb) {

    }

}
In our scene builder, we will reference this method to the close button. To do this, click on the close button. On the code section on the right side of the scene builder select exitCalculator in the On Action drop down and save.