


At IDR Solutions I spend a lot of time on the Development of the JPedal Java PDF Library and PDF to HTML5 Converter. Recently I have spent a lot of time studying the cloud and thought it might be useful to create some guides on how to use various cloud platforms with the NetBeans IDE.
If you want to run a Java web application on the Google Cloud then you are going to have to become acquainted with the Google App Engine (GAE) which lets you build and run applications on Google’s infrastructure. For those of you who are looking to host an application that you have already created, please be aware that the GAE doesn’t support every class in the Java Runtime Environment. For example java.awt.Color isn’t supported but org.w3c.dom.css.RGBColor is.
What you will need before you start:
- – Java 7 EE installed. Make sure it is set as your JAVA_HOME environment variable. We tried using Java 8 and encountered problems when using .jsp files
- – Apache Maven installed. I would recommend adding Maven’s bin directory to your PATH environment variable because this will make your life easier later e.g. add this to the end of your current PATH ;C:\Program Files\apache-maven-3.3.3\bin
- – Simple knowledge of how to operate your computer’s command line/terminal
1. Sign up for a Google Developer account
Before we can get started with the technical bits you have to be eligible to use the Google Cloud services. You can do this by either signing up for a 60-day free trial or by paying for the service. This page will give you some insight into what you can expect from the trial. Once you have successfully signed up you gain access to the Google Development Console, which will let you manage your application once it is deployed and other cloud resources.
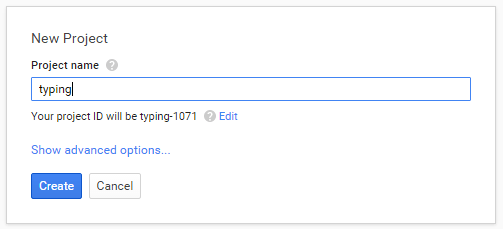
2. Create a new Project on the Google Developer Console
You first register a new project in the Google Developer Console. Click the Create Project button and enter a project name. Each project has a project ID which will either be the same as your project’s name or a slightly different ID will be suggested. This is because the project ID must be globally unique and someone is already using that ID. Once you have clicked Create you will receive notifications on the browser to confirm your project was created. This will create your application’s host location e.g. yourProjectId.appspot.com
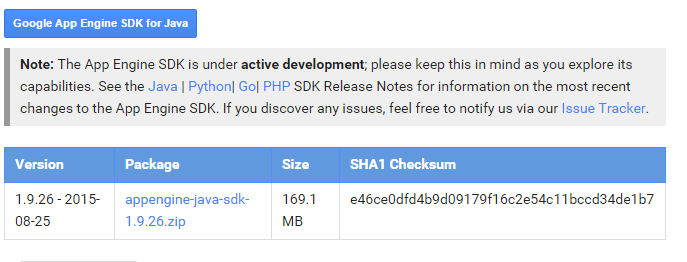
3. Download the Google App Engine SDK
Download the SDK from Google Cloud. You have to make sure you get the Java version as the page shows multiple. Once it has been downloaded, extract the zip from your downloads folder and save the extracted folder in your Program Files directory. e.g. C:\Program Files\appengine-java-sdk-1.9.26
4. Download the NetBeans Google App Engine plugin
This plugin will allow you to create and run a Google App Engine Server instance which is what we will use to deploy your applications to the Google Cloud Platform. Download the latest version. Gaelyk carried on the development of the plugin after Kenai created it but stopped development back in 2009. Make sure you download the most recent update. Again extract the download and place it in the Program Files directory
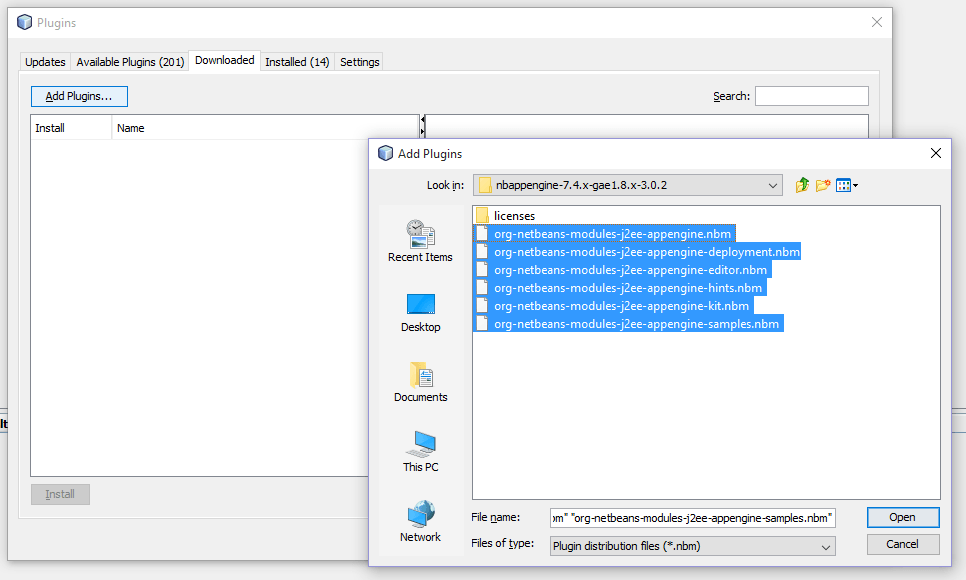
5. Add the Plugin to NetBeans
In your NetBeans IDE go to Tools menu and click the Plugins option. In the Plugins, window go to the Downloads tab and click Add Plugins. Navigate to where you saved the plugin in the Program Files directory and open all of the NetBeans Modules (.nbm). Click Install at the bottom left of the plugins window and an Installation Wizard will pop up. Accept the Licence Agreement and install the modules.
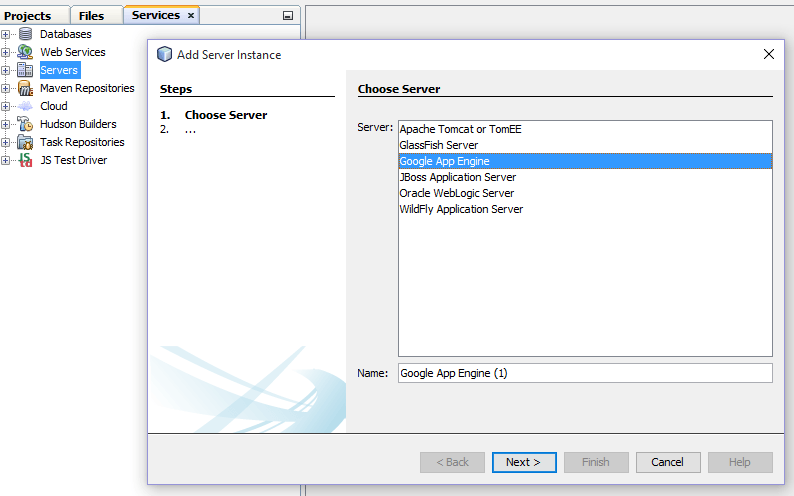
6. Create the Google App Engine Server instance
Go to your Services window, right-click on Servers and select the Add Server option. In the wizard select Google App Engine and click Next. For the installation location put the location of the SDK in the Program Files directory. e.g. C:\Program Files\appengine-java-sdk-1.9.26. You can leave the port numbers for now and change them later if need be. Click Finish. You should now have Google App Instance under Servers.
7. Create a Google App Engine Project
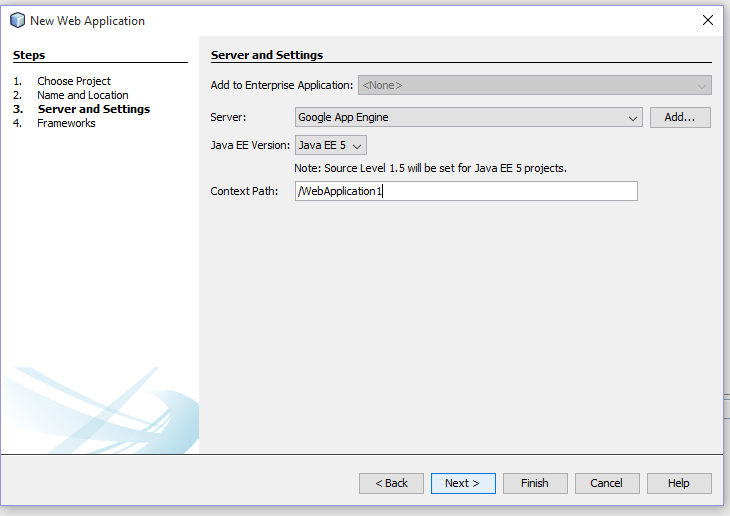
Now we can create a new Web Application. Go to the File menu and select New Project. In the Java Web category select Web Application. Fill in the name and location details for your project. On the Server and Settings screen select Google App Engine for the server. Java EE 5 is the only option for the Java EE version. Now click Finish and your project will be created.
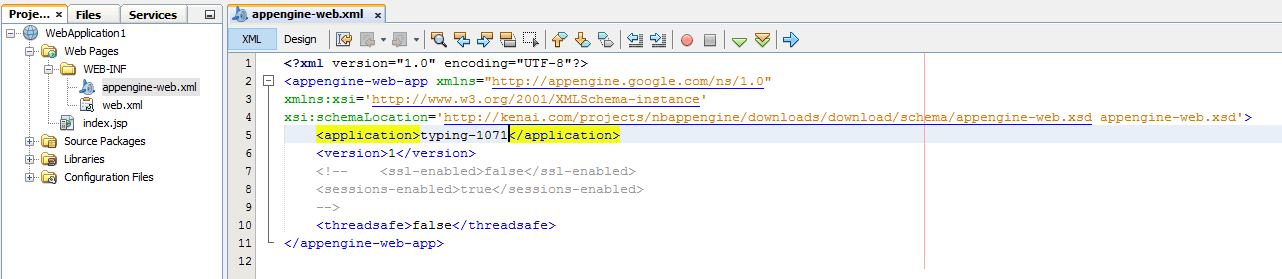
8. Change Project ID
Below shows what your project’s file structure should resemble. To correctly deploy your application to the Google Cloud Platform you need to add your project Id to the appengine-web.xml file. Remember to save the file.
9. Prepare the Project for Deployment
Right-click the project and there should be a Change email/password option. Here you should enter your Google Development Account credentials. Then right-click the project again and select Clean and Build which will compile the application for you.
10. First-time Deployment
This stage is needed for the very first deployment to Google App Engine. After you have completed this stage you will never have to carry this out for ANY other GAE project. I am using Windows so I will be using the command line. The commands will vary slightly for those on different Operating Systems.
Navigate to your Google App Engine SDK in your Program Files directory. Then use cd bin to navigate you in the SDK’s bin directory. From there you will need to run appcfg.cmd with the update argument and the path to your applications web directory e.g. appcfg update C:\Users\userName\Documents\NetBeansProjects\WebApplication1\web
If you get an error message related to JSP files or that you are pointing to the JRE instead of the JDK, then this may be due to your PATH environment variable. If you open up your PATH and see something along the lines of C:\ProgramData\Oracle\Java\javapath then you need to delete and replace this with the path to your current SDK’s bin directory. e.g. C:\Program Files\Java\jdk1.7.0_79\bin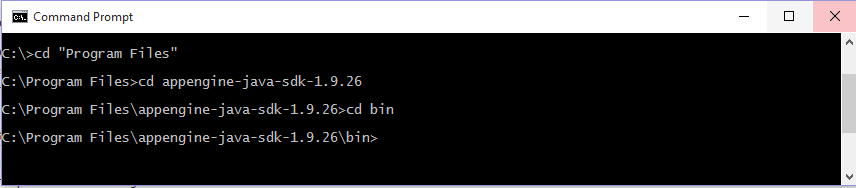
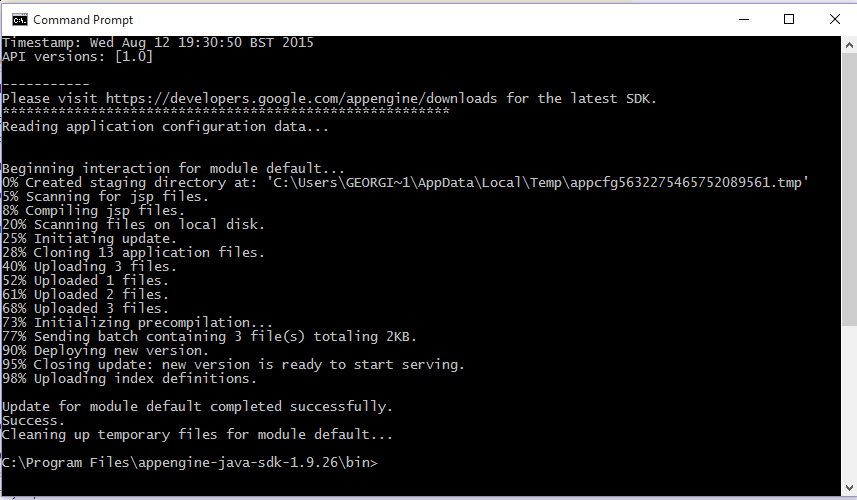
You should be asked for an authentication code. A web browser will be opened and you will be asked to sign in to your Google account if you are not signed in already. After that there will be a code displayed which you need to copy from your browser into the command line. You should see output similar to below if your application has been deployed correctly.
11. Deployment from here on
Like I said before you will not have to complete step 10 again. You can simply right-click your project in NetBeans and select the Deploy to Google App Engine option. Much simpler right?
12. View your application
To see your application running go to yourProjectId.appspot.com
And voila! There you have it, ladies and gentlemen. That is how to set up and deploy an application to the Google Cloud using the Google App Engine.
Next time I will be looking at ‘How to set up Amazon Cloud/AWS Elastic Beanstalk on the NetBeans IDE‘
Hopefully, you found this guide Tutorial useful, if you have not read my other cloud series articles be sure to check them out below:
- How to set up Amazon Cloud/AWS Elastic Beanstalk on the NetBeans IDE
- How to use the Microsoft Azure Cloud on the NetBeans IDE
If you want to try running Java Software on the Amazon and Azure Cloud you can try following these handy tutorials