Setting up Glassfish for our Web Service based PDF converter was a relatively straight-forward job, but there are some nuances to be aware of. In this article, I will take you through the steps I took to set up Glassfish and deploy an application with it.
I’ll be using Ubuntu Server 12.04.4 setup on a local virtual machine, but I’ve also used the same methods on CentOS servers so it’s fair to say this will work in most major distributions of Linux.
Installing a JDK from Oracle
To download the most recent JDK from Oracle you can’t simply use wget to fetch the jdk directly. My initial idea was to just download the jdk to my desktop and use Secure Copy (scp) to copy it over to my server. The issue with this option is that it isn’t as viable an option on Windows as it is on Linux or Unix, due to the lack of a built in scp function.
However, Irani over on StackOverflow has provided a better solution which uses wget with a specific cookie. So in your SSH terminal type the following:
wget --no-cookies --header "Cookie: gpw_e24=http%3A%2F%2Fwww.oracle.com%2F" http://download.oracle.com/otn-pub/java/jdk/7u51-b13/jdk-7u51-linux-x64.tar.gz
Now we need to extract the compressed JDK into a folder. Type the following command:
tar xzf jdk-7u51-linux-x64.tar.gz
This will extract the JDK into a new directory (in this case called jdk1.7.0_51). Remember the location of directory, it will be important in the next step.
Setting up Glassfish
Luckily, downloading Glassfish is a lot simpler than the JDk. Type into the terminal:
wget http://download.java.net/glassfish/4.0/release/glassfish-4.0.zip
Once downloaded, it needs to be extracted with unzip:
unzip glassfish-4.0.zip
You should now have a directory called glassfish4, The next step is to associate the JDK we downloaded previously with Glassfish itself. To do this, we need to edit the file asenv.conf which is located in glassfish4/glassfish/config/. Using a command line text editor such as vi or nano add the following line to the bottom of the file and change the path in the quotes to match the absolute path to your JDK location:
AS_JAVA="/usr/java/jdk1.7.0_51"
Save the changes and exit your editor.
Now we can start the server, navigate to glassfish4/bin and run the following command:
./asadmin start-domain
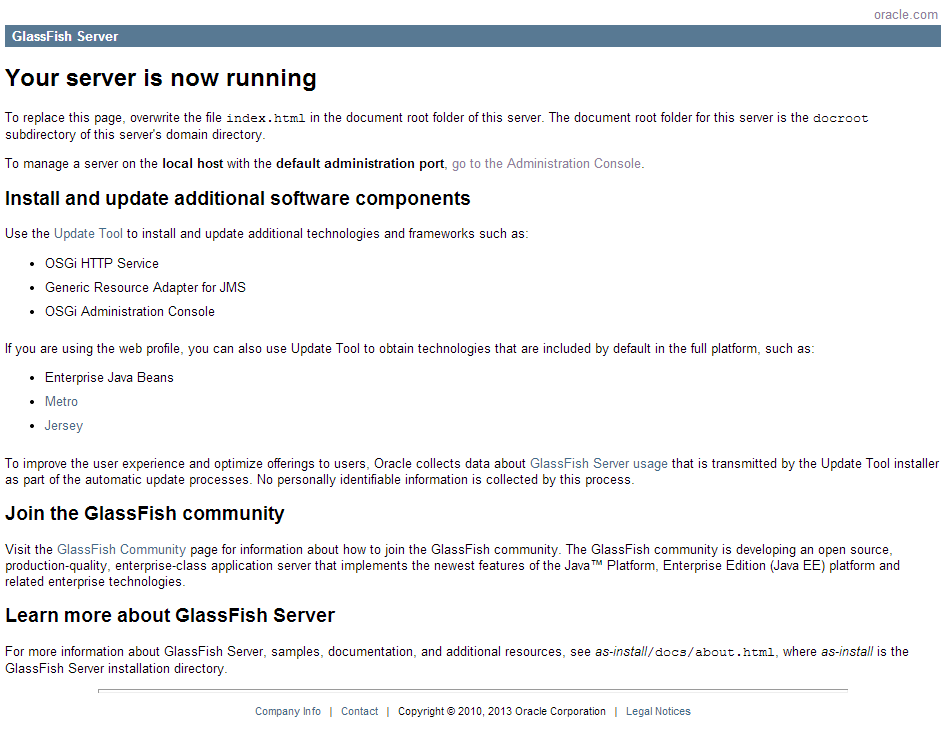
Your server has now started, to check if it’s working you can go to your server’s IP address or URL with the default Glassfish port 8080. You should see a page similar to the following:
Deploying an Application
Now the server is up and running, we can deploy our application to glassfish. For the sake of simplicity, I’ll be uploading the compiled war file from our server example, which you can find on Github. We have two options to deploy our application. The first is to use Secure Copy (scp) to copy the application to the server and deploy via command line. The other is to enable remote admin and upload it via Glassfish’s web interface. Both of these are viable options so I’ll explain both.
Via Command Line
The first step is that we need to copy the war file to the server. *nix based computers have scp natively available via the command line, for Windows you’ll have to search around for a program that can emulate the functionality. In a terminal window insert the following:
scp /path/to/application.war username@server.location.com:~
Once it’s on the server, ssh back into your server and type the following (“–contextroot” is an optional flag, but it means we know where out application is being deployed to):
./path/to/glassfish4/bin/asadmin deploy --contextroot "/pdf2html5" /path/to/application.war
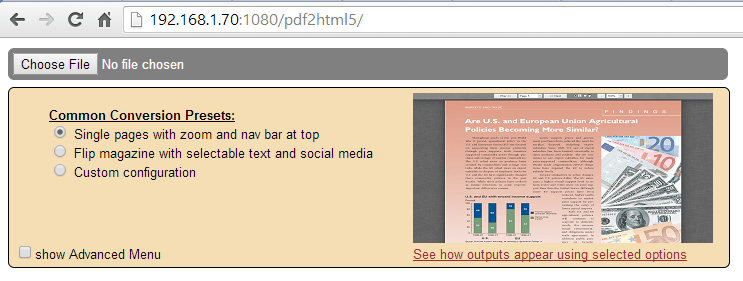
Now if we navigate to our server in the browser, we can see the application is succesfully deployed:
Via the Web Interface
Glassfish also comes with a web environment which gives you a graphical interface to work with. However for security reasons it’s disabled by default. To enable it, you must first set a password for the admin account type:
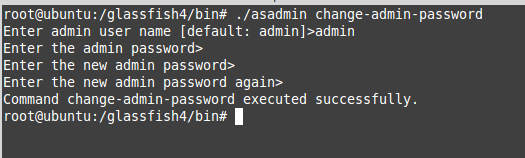
glassfish4/bin/asadmin change-admin-password
You’ll be prompted for the admin user name (which is admin by default), then the current password (which is blank by default so just press enter) finally you’ll be asked to enter your password and confirm it.
Now that’s a password is set you can enable the remote admin, type the following and then enter the admin name and password:
./asadmin enable-secure-admin

Now restart the server with the following:
./asadmin restart-domain
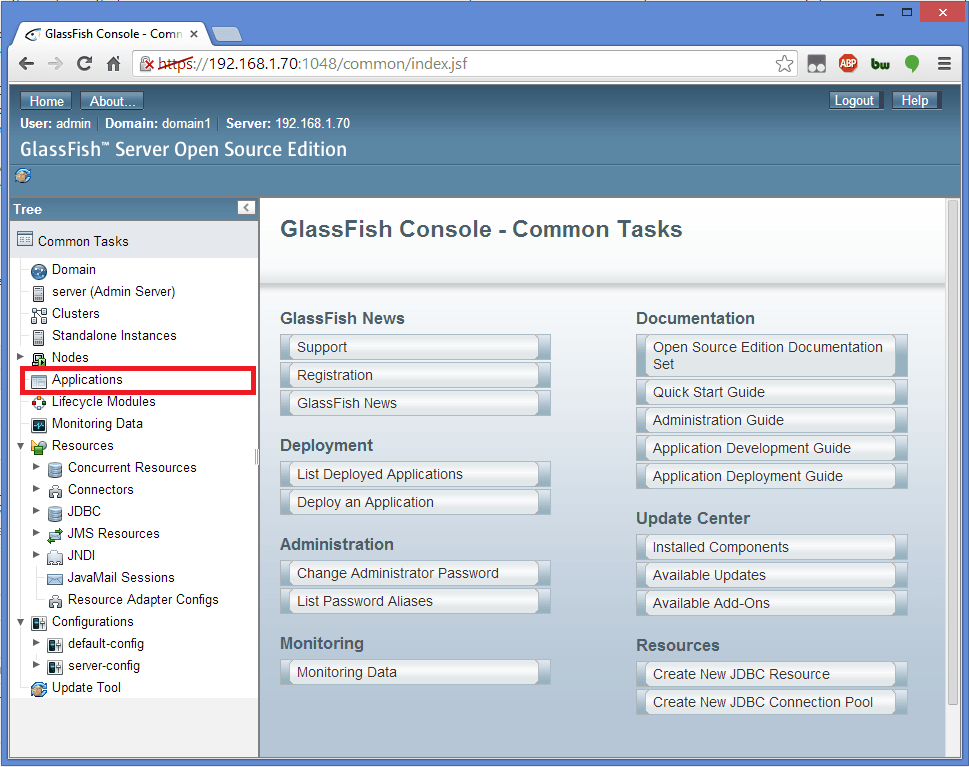
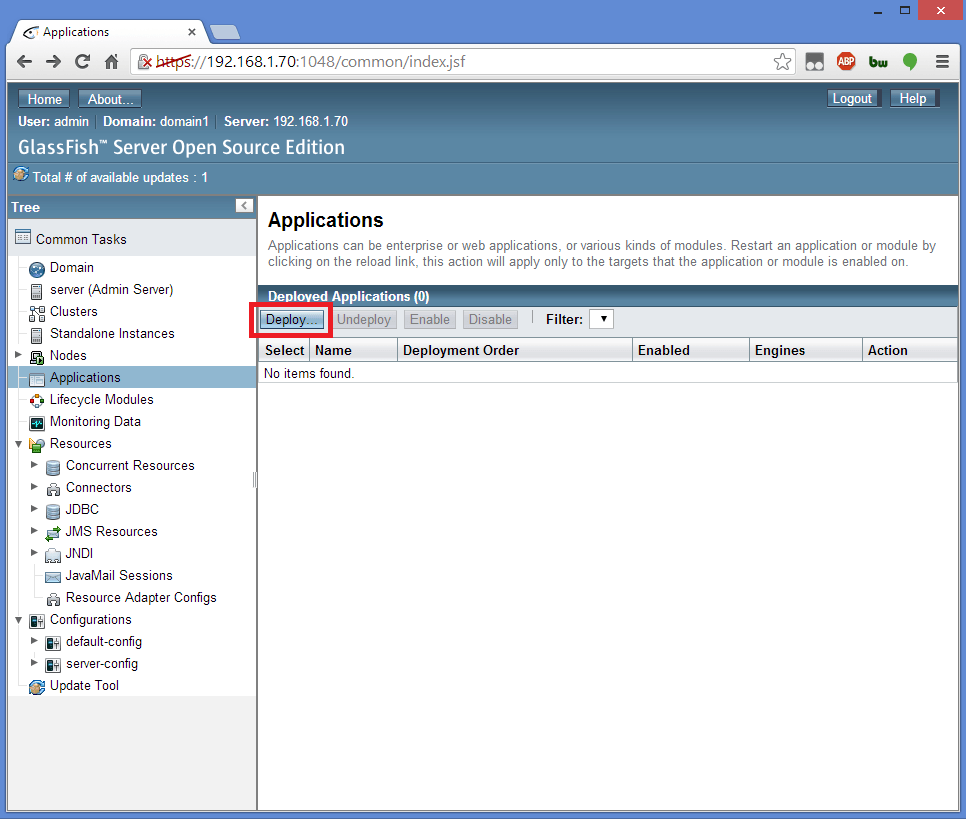
Now we can access the web interface, go to your server’s address with the admin port on the end (4848 by default) and you should see a login window, enter your admin username and password to log in. From here select “Applications” from the bar on the left.
Then select Deploy.
Press the choose file button and select the war file you want to upload, you can also optionally select the context path.
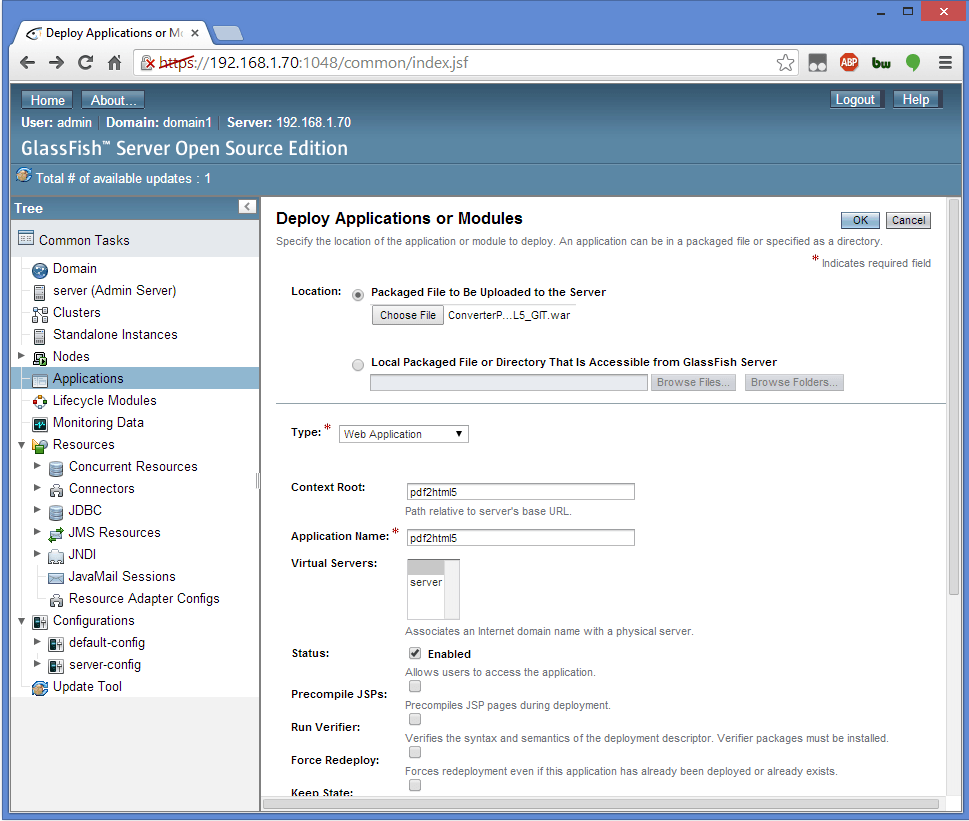
Finally press OK and the file will be uploaded and deployed.
And there you have it, you now have Glassfish set up on your server and your application is good to go.
Our software libraries allow you to
| Convert PDF files to HTML |
| Use PDF Forms in a web browser |
| Convert PDF Documents to an image |
| Work with PDF Documents in Java |
| Read and write HEIC and other Image formats in Java |
Excellent Tutorials.
Very straight forward.
Thank you.
Great Stuff.
Thank you tons.