At IDRSolutions, we are currently optimizing our testing process by using Hudson and Jenkins. We are running these on our own servers inside our own internal network. So part of the process of setting up our tests to be automated quickly by Hudson and Jenkins required some knowledge of SSH and Port Forwarding to give our external team access.
Having a test box setup with SSH support allows us to access our test box from anywhere in the world. This gives the remote employees of IDRSolutions the same control over our tests and web-services as everyone in the office.
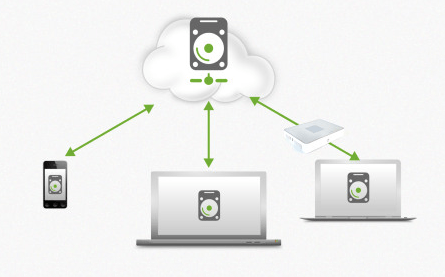
Seeing the possibilities and potential of remotely controlling a headless box inspired me to setup a home Network Attached Storage (NAS) drive. Some research on the internet and with a budget in mind, my girlfriend and I quickly acquired a 6TB WD MyCloud Mirror.
The MyCloud is incredibly easy to setup if you want the basic features of a personal cloud. However if you want the most out of your NAS (providing it supports FTP and SSH), then keep reading as this article will explain how to setup FTP access and SSH on your home NAS.
The main benefit for us to have a NAS which we can FTP to is that public computers often stop you from installing third-party software, we can use the operating systems / web-browsers, in-built FTP client, to connect to our files, this bypasses the need for third-party apps (such as the WDMyCloud apps) to access the content on our NAS drive.
Enable FTP and SSH
The first step is to make sure you have enabled SSH and FTP from your NAS admin control panel. With the WD MyCloud, this can be accessed through http://mycloud, for MAC users it’s mycloud.local.
Once you have enabled FTP and SSH on your NAS, it’s important to configure your SSH and FTP settings, you should note what Port you have told the FTP / SSH to use, by default, FTP is on port 21 and SSH is on port 22.
It’s also important to set a password for your FTP and SSH, this will prevent unauthorized external access to your NAS.
Port Forwarding FTP and SSH
If all you wish to do is access your FTP from your local-network then you can skip the port-forwarding step and just connect to your NAS on a local IP and port, which for example may look like : 192.168.0.25:21.
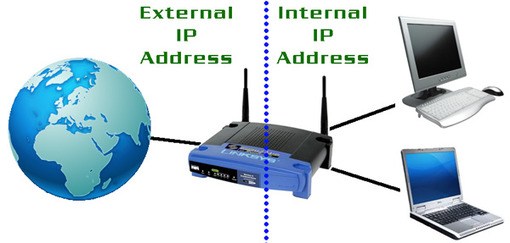
However, if you wish to connect to your FTP or SSH from anywhere in the world through your WAN I.P, then we need to port forward the designated FTP and SSH port.
You should log into your router, you can do this on most routers by typing 192.168.0.1 in your browser, if you have not changed your router username and password then it can usually be found on the back/bottom of the physical router.
Now navigate to the section where you can designate a new Port Forwarding Rule,if you are struggling to find section for your router, please see this link.
Adding a new Rule will allow you to set a Start port and an End port. Give the new Rule a name, let’s call the first one NASFTP, and set its Start and End Port to whatever port you designated for the NAS FTP when you configured your FTP in the previous step, the default was 21.
Next, you will need to enter an I.P address for the router to forward to, this will be the local I.P address of your NAS, e.g 192.168.0.25. Set the Protocol, when you configured your FTP in the previous step, you may have had to set a Protocol, if not then the default is likely TCP. Finish by adding the NASFTP Rule.
Now create a new Rule for your SSH, and follow the same port forwarding steps but replace the port number with the one you designated for your NAS SSH.
Find Your Routers WAN I.P
On many routers, this can be obtained via a sticker on the back/base of the physical router, alternatively, you can find your routers WAN I.P by the Routers admin control panel.
Do not confuse this with your Routers local I.P, the WAN I.P is what the rest of the world can connect to, the local I.P (LAN) is what only people on your network can connect to.
Now that we know our routers WAN I.P (External IP), we can use it to connect to either our FTP or SSH by designating a port.
Connect to Your NAS From The World Wide Web
Load up any browser or FTP client and type in “ftp://” along with your Routers WAN I.P. If you want to connect to your FTP then append the designated port to the end like so “ftp://21.1.1.1:21”.
To connect to the SSH on Windows you will need to download a program such as PuTTY. For Linux/Mac you can use the “ssh” command in Terminal. Type in the WAN I.P and append the port you designated in Step 1 for your NAS SSH, our default was “:22”, so the address would look something like “21.1.1.1:22”.
If you set up some form of username and password then you should now be prompted to enter these details. You should now have access to the files on your FTP/SSH.
If you don’t want to use a username/password with your SSH, you may need to setup an authentication key, see here for more info.

Now you have remote access to your home NAS, there’s a whole magnitude of possibilities, you could even setup your own home repository using GIT or stream movies and pictures directly to any device in the world from your home.
Thank you for reading this blog article on the ‘The Remote Programmers Guide to NAS’, I hope you found it of use, if you have any questions or suggestions, please leave them in the comments section below.
You may be interested in my other blog articles which can be found here.
Our software libraries allow you to
| Convert PDF files to HTML |
| Use PDF Forms in a web browser |
| Convert PDF Documents to an image |
| Work with PDF Documents in Java |
| Read and write HEIC and other Image formats in Java |

