At IDR Solutions lately, I have been working a lot with the NetBeans platform has part of my preparation for my talk at JavaOne 2014. Some of the things I have been working on include writing various plugins for the NetBeans IDE.
In this article I am going to take you step by step through the process of creating a simple and fully functional Web Browser Plugin for the NetBeans platform that looks like this:
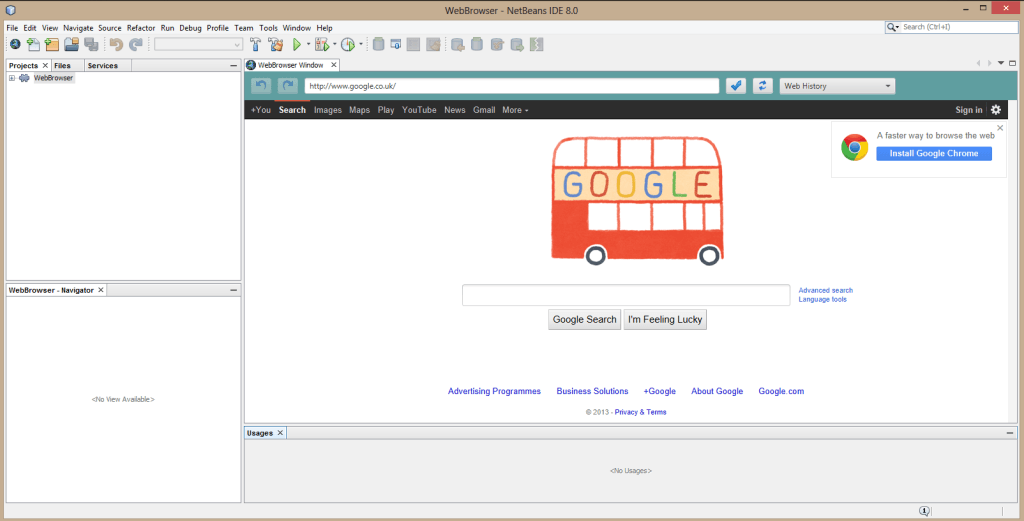
Before we begin, here are the Pr-requirements to this guide. You need the following:
– NetBeans Platform
– Java8
– Set of 16×16 images ( for your browser icon, back button, forward button, enter button and reload button)
Lets began:
1. Create a New Project
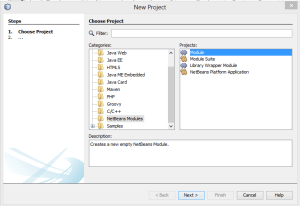
File → NewProject → NetBeans Modules → Module and click Next to continue.
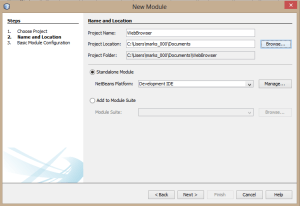
Give your Project a name and select the location that you want your project to be save to. Click Next.
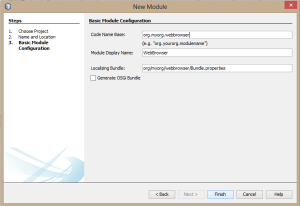
Give your project a unique name (all in lower case letters) as well as the displayed name. Click Finish.
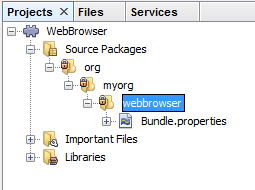
Now you should be able to see your project being created.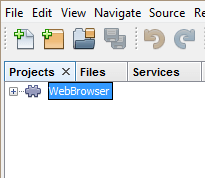
2. Add Action to your Project
Right click on the webbrowser →New → Action
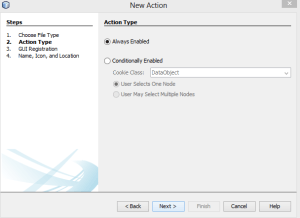
Accept the default settings and click Next to continue.
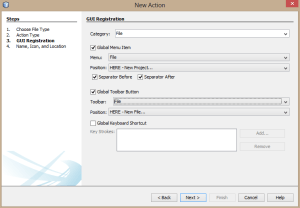
Select the category that you want your project to appear under in the NetBeans category bar.
Select the position of your plugin in the drop down list under the category you choose.
If you want the short cut icon of your plugin to appear in the toolbar select the “Global Toolbar Button” option. Click Next to continue.
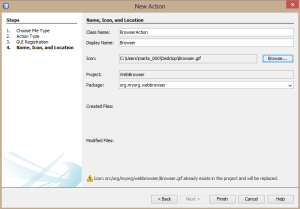
Type the Class Name and the Display Name. If you choose the “Global Toolbar Button” option select the icon for your plugin.
3. Add the TopComponent
Right click on the webbrowser →New → Window
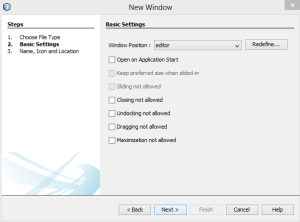
Select editor in the Window Position and click Next
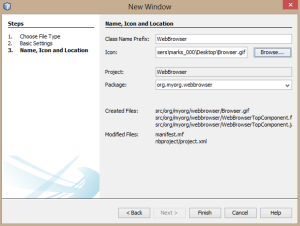
Type the Class Name and again you can select the same image icon as before. Click Finish
Once the project is created and the Action and TopComponent is added is time to write the code for our browser. But before we do that make sure that you add the images that will be displayed on the buttons to the plugin file. To do so go to the directory that you save your WebBrowser plugin and select:
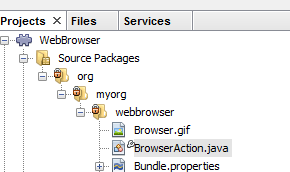
WebBrowser -> src -> org -> myorg -> webbrowser -> paste your images.
Also make sure that the Source Level that you are using is 1.8.
Right click on the WebBrowser plugin go to Properties and select the 1.8 Sourse Level.
Lets add some code!!
4. Add code to the TopComponent Class.
In this part of the tutorial we will be adding the JavaFX code into the Swing application as the NetBeans Plugins are Swing base applications and our browser is written in JavaFx. So you can also master your skills on integrating JavaFX with Swing.
Add the following lines of code:
public final class WebBrwserTopComponent extends TopComponent {

//Creating JFXPanel for the integration of JavaFX with Swing
 JFXPanel jfxPanel = new JFXPanel();
double height;
double width;
Scene scene;
WebView browser;
Button backButton;
Button forwardButton;
TextField search;
Replace the componentOpen method with the following code:
@Override
public void componentOpened() {
// TODO add custom code on component opening
this.setLayout(new BorderLayout());
this.add(jfxPanel, BorderLayout.CENTER);

Platform.setImplicitExit(false);
Platform.runLater(new Runnable() {
@Override
public void run() {
initFX();
}
});
}

public void initFX() {

Scene scene = Browse(this.getBounds().width, this.getBounds().height);
jfxPanel.setScene(scene);
}
Replace the componentClosed method with the following code:
@Override
public void componentClosed() {
browser.getEngine().load(null);
}
Add Browse method:
public Scene Browse(double width, double height) {
this.height = height;
this.width = width;
browser = new WebView();

BorderPane borderPane = new BorderPane();
borderPane.setTop(addTopToolBar());
borderPane.setCenter(browser);

browser.getEngine().load("http://www.google.co.uk");
scene = new Scene(borderPane, this.width, this.height);
return scene;
}
Add addTopToolBar method:
//Setting up the tool bar
private HBox addTopToolBar() {
HBox topToolBar = new HBox();
topToolBar.setPadding(new Insets(10, 10, 10, 10));
topToolBar.setSpacing(10);
topToolBar.setStyle("-fx-background-color: CADETBLUE");
//Adding image to the button
Image backButtonImage = new Image(getClass().getResourceAsStream("back.png"));
backButton = new Button();
backButton.setGraphic(new ImageView(backButtonImage));
//Adding functionality to the button
backButton.setOnAction((ActionEvent e) -> {
browser.getEngine().load(goBack());
});
//Adding shadow efect to the button when user hover on it
DropShadow backButtonShadow = new DropShadow();
backButton.addEventHandler(MouseEvent.MOUSE_ENTERED, (MouseEvent e) -> {
backButton.setEffect(backButtonShadow);
});
//Remove te shadow efect from the button when user does't hover on it
backButton.addEventHandler(MouseEvent.MOUSE_EXITED, (MouseEvent e) -> {
backButton.setEffect(null);
});
Image forwardButtonImage = new Image(getClass().getResourceAsStream("forward.png"));
forwardButton = new Button();
forwardButton.setGraphic(new ImageView(forwardButtonImage));

forwardButton.setOnAction((ActionEvent e) -> {
browser.getEngine().load(goForward());
});
DropShadow forwardButtonShadow = new DropShadow();
forwardButton.addEventHandler(MouseEvent.MOUSE_ENTERED, (MouseEvent e) ->; {
forwardButton.setEffect(forwardButtonShadow);
});
forwardButton.addEventHandler(MouseEvent.MOUSE_EXITED, (MouseEvent e) -> {
forwardButton.setEffect(null);
});

Image reloadButtonImage = new Image(getClass().getResourceAsStream("reload.png"));
Button reloadButton = new Button();
reloadButton.setGraphic(new ImageView(reloadButtonImage));

reloadButton.setOnAction((ActionEvent e) -> {
browser.getEngine().reload();
});
DropShadow reloadButtonShadow = new DropShadow();
reloadButton.addEventHandler(MouseEvent.MOUSE_ENTERED, (MouseEvent e) -> {
reloadButton.setEffect(reloadButtonShadow);
});
reloadButton.addEventHandler(MouseEvent.MOUSE_EXITED, (MouseEvent e) -> {
reloadButton.setEffect(null);
});
//Displying browse history in a combo box
ComboBox webHistoryComboBox = new ComboBox();
webHistoryComboBox.setPromptText("Web History");
WebHistory history = browser.getEngine().getHistory();

history.getEntries().addListener(new ListChangeListener<WebHistory.Entry>() {
@Override
public void onChanged(ListChangeListener.Change<? extends WebHistory.Entry> c) {
c.next();
for (WebHistory.Entry e : c.getRemoved()) {
webHistoryComboBox.getItems().remove(e.getUrl());
}
for (WebHistory.Entry e : c.getAddedSubList()) {
webHistoryComboBox.getItems().add(e.getUrl());
}
}
});
//Navigate to the link in the history index
webHistoryComboBox.setOnAction(new EventHandler<ActionEvent>() {
@Override
public void handle(ActionEvent ev) {
int offset
= webHistoryComboBox.getSelectionModel().getSelectedIndex()
- history.getCurrentIndex();
history.go(offset);
}
});
//Create an instance of text field for search bar
search = new TextField();
search.setPrefWidth(650);

Image goButtonImage = new Image(getClass().getResourceAsStream("go.png"));
Button goButton = new Button();
goButton.setGraphic(new ImageView(goButtonImage));

goButton.setOnAction((ActionEvent e) -> {
// adding the http or https prefix if user didn't type it
if (search.getText(0, 7).equals("http://") || search.getText(0, 8).equals("https://")) {
browser.getEngine().load(search.getText());

} else if (!search.getText(0, 7).equals("http://")) {
browser.getEngine().load("http://" + search.getText());
} else {
browser.getEngine().load("https://" + search.getText());
}
});
DropShadow goButtonShadow = new DropShadow();
goButton.addEventHandler(MouseEvent.MOUSE_ENTERED, (MouseEvent e) -> {
goButton.setEffect(goButtonShadow);
});
goButton.addEventHandler(MouseEvent.MOUSE_EXITED, (MouseEvent e) -> {
goButton.setEffect(null);
});
//Enabling and Disabling back and forward buttons
browser.getEngine().getLoadWorker().stateProperty().addListener(new ChangeListener() {

@Override
public void changed(ObservableValue observable, Object oldValue, Object newValue) {

if (!browser.getEngine().getHistory().getEntries().isEmpty()) {
int index = browser.getEngine().getHistory().getCurrentIndex();
search.setText(browser.getEngine().getHistory().getEntries().get(index).getUrl());

if (index == 0) {
backButton.setDisable(true);
} else {
backButton.setDisable(false);
}

if (browser.getEngine().getHistory().getEntries().size() == 1) {
forwardButton.setDisable(true);
} else if (index < browser.getEngine().getHistory().getEntries().size() - 2) {
forwardButton.setDisable(false);
} else if (index < browser.getEngine().getHistory().getEntries().size() - 1) {
forwardButton.setDisable(false);
} else if (index == browser.getEngine().getHistory().getEntries().size() - 1) {
forwardButton.setDisable(true);
}
}
}
});

topToolBar.getChildren().addAll(backButton, forwardButton, search, goButton, reloadButton, webHistoryComboBox);

return topToolBar;
}
Add the goBack method:
//Adding functionality to the back button
public String goBack() {
final WebHistory history = browser.getEngine().getHistory();
ObservableList<WebHistory.Entry> entryList = history.getEntries();
int currentIndex = history.getCurrentIndex();

Platform.runLater(new Runnable() {
public void run() {
history.go(- 1);
}
});

if (currentIndex > 1) {
entryList.get(currentIndex - 1);
backButton.setDisable(false);
} else {
entryList.get(history.getCurrentIndex());
backButton.setDisable(true);
forwardButton.setDisable(false);
}
return entryList.get(currentIndex).getUrl();
}
Add the goForward method:
//Adding functionality to the forward button
public String goForward() {
final WebHistory history = browser.getEngine().getHistory();
ObservableList<WebHistory.Entry> entryList = history.getEntries();
int currentIndex = history.getCurrentIndex();

Platform.runLater(new Runnable() {
public void run() {
history.go(1);
}
});
if (currentIndex < entryList.size() - 2) {
entryList.get(currentIndex + 1);
forwardButton.setDisable(false);
} else {
entryList.get(history.getCurrentIndex());
forwardButton.setDisable(true);
backButton.setDisable(false);
}
return entryList.get(currentIndex).getUrl();
}
5. Add code to the Action Class.
Replace the actionPerformed method with the following code
@Override
public void actionPerformed(ActionEvent e) {

TopComponent tc;
//this gives you a new window each time
tc = new WebBrowserTopComponent();
tc.open();
tc.requestActive();
}
So that is how t![]() o create WebBrowser plugin. When you run the code NetBeans opens an other instance of NetBeans where you can test your code. However if you want to install your WebBrowser plugin into NetBeans Platform right click on the WebBrowser plugin and select Install/Reload in Development IDE. Now you should be able to see your WebBrowser icon on the toll bar as well as in the file option.
o create WebBrowser plugin. When you run the code NetBeans opens an other instance of NetBeans where you can test your code. However if you want to install your WebBrowser plugin into NetBeans Platform right click on the WebBrowser plugin and select Install/Reload in Development IDE. Now you should be able to see your WebBrowser icon on the toll bar as well as in the file option.
6. Conclusion
Now you are having fully functional web browser installed in your NetBeans Platform.
Please check our blog for more Plugin and NetBeans related articles. If your interested you can download our PDF plugin from here.
This post is part of our “NetBeans article Index” series. In these articles, we aim to explore NetBeans in different ways, from useful hint and tips, to our how-to’s, experiences and usage of the NetBeans IDE.
Our software libraries allow you to
| Convert PDF files to HTML |
| Use PDF Forms in a web browser |
| Convert PDF Documents to an image |
| Work with PDF Documents in Java |
| Read and write HEIC and other Image formats in Java |
Nice tutorial on javafx!!