
At IDR Solutions I spend a lot of time on the Development of the JPedal Java PDF Library and PDF to HTML5 Converter. Recently I have spent a lot of time studying the cloud and thought it might be useful to create some guides on how to use various cloud platforms with the NetBeans IDE.
Last time I wrote about ‘How to use the Google App Engine with the NetBeans IDE‘, this time I will take you through using the Amazon Cloud/AWS Elastic Beanstalk on the NetBeans IDE.
If you want to run a Java web application on the Amazon Cloud then you are going to have to become good friends with the Amazon Web Services (AWS) Elastic Beanstalk, which is a Platform As A Service (PaaS) that allows users to create, push and manage web applications in the Amazon Web Services console.
What you will need before you start:
- – The great thing about the Amazon Cloud is that the majority of the resources that you will need are already included in the latest NetBeans IDE.
- – The Amazon Beanstalk cloud service is already pre-installed and just needs to be set up.
- – To connect to AWS we have to use Apache Tomcat servers which again are already installed.
1. Sign up for an Amazon Web Services account
First things first we need to get you an Amazon Web Services account. You can create an account and sign up on the AWS Console. The trial version is called AWS Free Tier and is active for a full 12 months. AWS has a wide range of services and utilities available, and with the Free Tier, you gain access to a handful of them with a decent monthly amount of credit to use up. Find out more about the allowance and Free Tier on AWS website.
2. AWS Console
It can seem a bit daunting at first when you log into the console because of the range of services available. As this is a simple tutorial we are only going to use two of these services – Elastic Beanstalk (obviously) and Identity & Access Management or IAM for short.
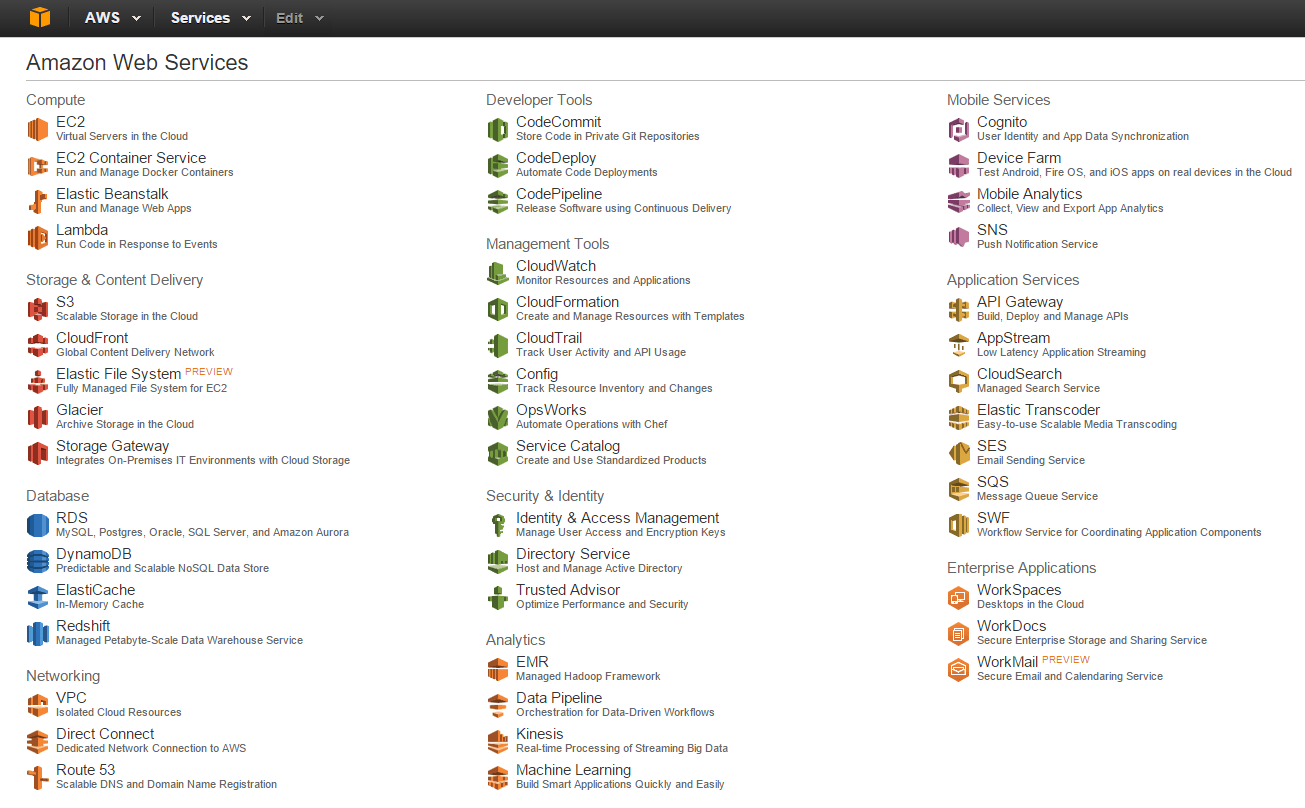
3. Elastic Beanstalk
In order to deploy an application, we need to create an environment that the application can run in. From the console’s compute section select Elastic Beanstalk and you will be greeted with the following screen:
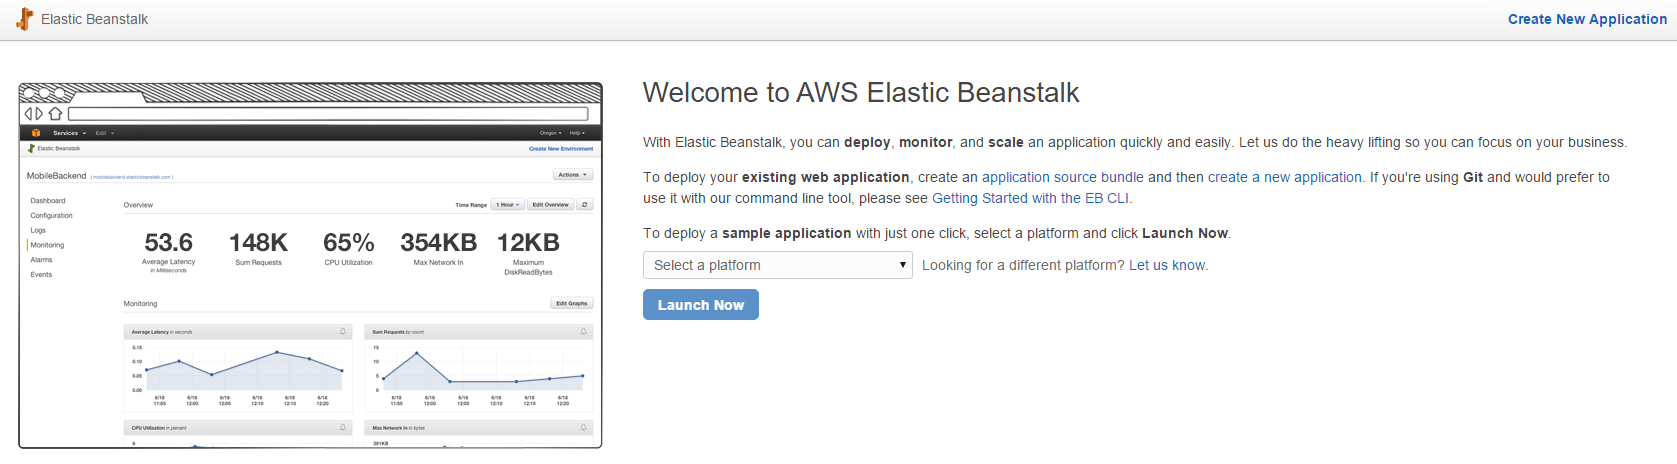
We are going to create our own application in NetBeans later so for now click Create New Application in the top right corner. Supply a name for your application and click Next. Now you will be asked to select an environment. We only want to deploy a standard application so click Create Web Server.
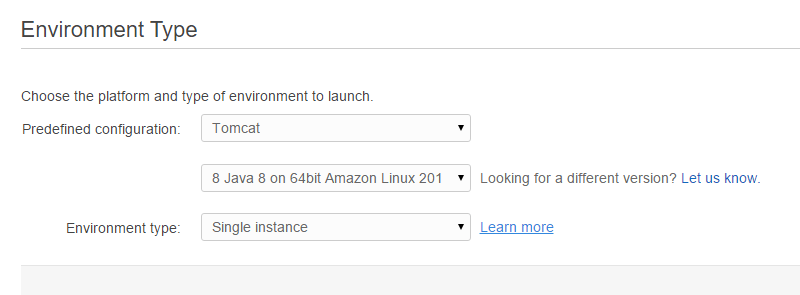
Now here is the snag – for the Predefined configuration choose ‘Tomcat’ and not Java. We need to do this so that we can use the Tomcat servers with NetBeans later. For Environment Type choose ‘single instance’. If you go on to use Amazon cloud for your applications this should be the mode you create and test your application in. It will be lower on resources and easily upgradable later on if needed.
For the Application Version just accept the sample application. The Environment Name must be unique among your environments but the Environment URL must be globally unique so you will have the check the availability. Don’t add any additional resources. For the configuration, details make sure the Instance Type is ‘t1.micro’ and leave the rest as the default settings. Click Next. Leave Environmental Tags empty.
On the permissions screen, you have to select Create New Roles roles for your environment. Clicking Next will allow you to create these. Roles are needed as they are used to delegate resources from the AWS that normally would not be allowed access. Leave the defaults and click Allow and then Launch. Now you have set up your environment. It may appear in a grey box like below while the environment is setting itself up but it will turn green once completed.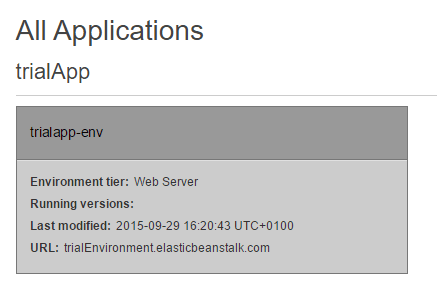
Before we go onto the next section please check and make a quick note of your Elastic Beanstalk region. It appears next to your name in the top right menu. You will need this when you have to configure NetBeans later.
3. Create user
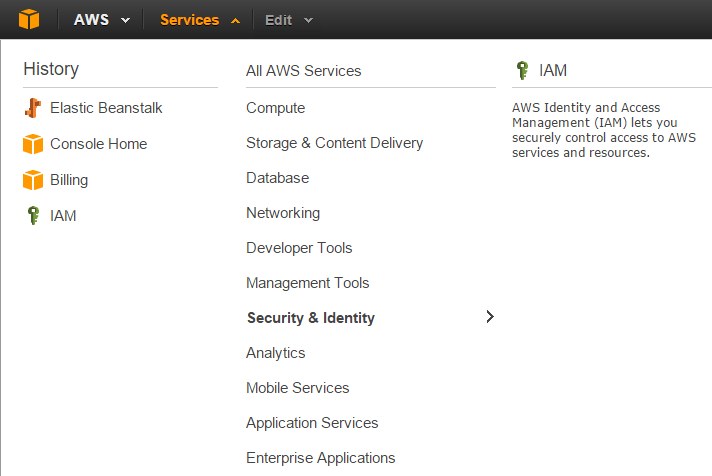
In order for you to use the environment you have to create a user. To do this we have to use the Identity & Access Management service which you can navigate to by clicking on services at the top and selecting IAM which is in the Security & Identity menu.
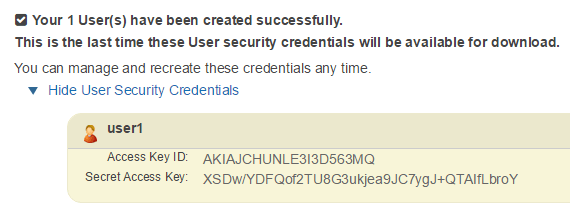
When in IAM navigate to the user section and select Create New Users. You can create up to 5 users at once. Enter one name and select Create. Every user will have a unique set of credentials assigned to them. It is important that you make a note of these now as you won’t be able to access them again. I would recommend downloading the credentials so that you definitely have a copy. Don’t worry too much if you lose the keys though, as you can create new keys whenever you want.
4. Grant Permissions via policies
Now that you have created a user it is time to grant them some policies, otherwise, they won’t be allowed to perform any actions such as deploying an application or even connecting to the AWS console via NetBeans. You can do this one of two ways:
- a) By going to the Groups section in IAM to create a set of permissions that can be given to multiple or a ‘group’ of people
- b) By selecting a user in the User section and selecting Attach Policy.
Since we are only going to use the one user we will use b). Select the AdministratorAccess policy which will give you every permission and essentially create an administrator. Afterward, select Attach Policy.
5. Configure NetBeans
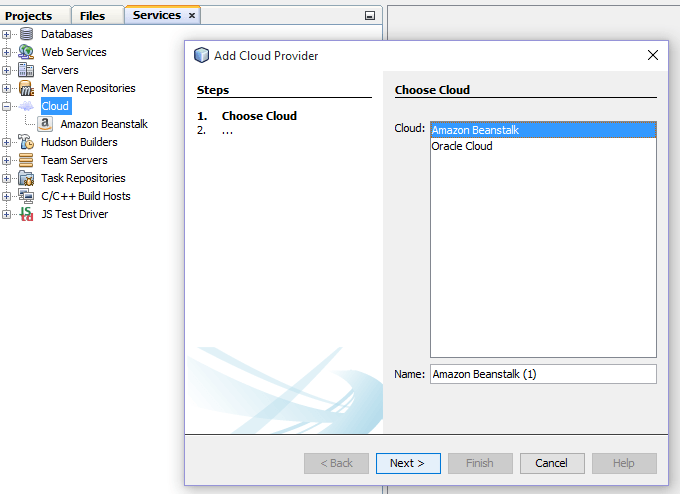
To run web applications on the cloud we need to create a cloud instance that will create your necessary server instance for you. To do this navigate to your Services window and right-click on Cloud and select the Add Cloud option. Select Amazon Beanstalk and click Next.
For the Region field, you should select the region that you made a note of earlier in the tutorial. Your Access Key ID and Secret Access Key are in your credentials file that you downloaded. The file can be opened by a text editor e.g. WordPad. When copying the credentials make sure you are splitting the codes right. They are the last two parts of the file separated by commas. The picture below shows the Access Key ID selected.

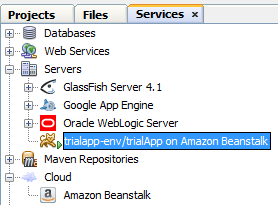
After clicking Next you will see that the Server will be created using the environment we created earlier. Click Finish and you will now be able to see a new server and cloud instance in your Services window.
6. Create and Deploy a Web Application
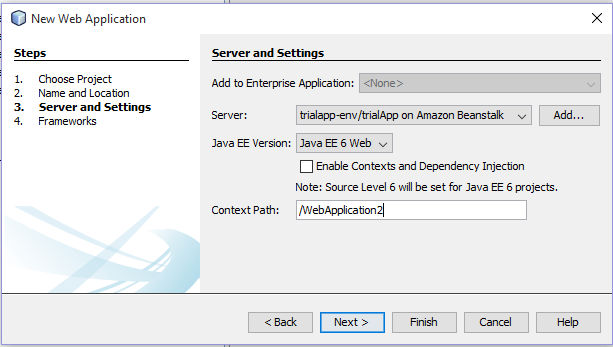
To create a web application go to the Projects window, right-click and select Create New Project. Then in the Java Web category select Web Application. On the next screen name your project. When you come to the Server and Settings page set the Server to the environment server we created in the above steps.The latest Java EE version supported in version 6. Click Finish and your project will be created.
Now for the complicated deployment process. I hope that you have a pen and paper handy because this process is mind-boggling, especially if you have read my previous article about using the Google App Engine to deploy applications. Anyway first right-click the project and click Run. Then you wait. And wait. And then wait a little bit more… and then voila your browser will open up your application in a new tab when it is finally ready. Okay, so I lied when I said it can be complicated but it can test your patience. Uploading applications can take a few minutes, which is a long and agonizing time to wait when you are trying to test a fix.
You can access this page from the browser by entering the Environment URL you created earlier for your project or if you can’t remember that, then you can access it from the AWS Console. Just go back to the Elastic Beanstalk section, select your environment and there will be a link to your application.
Hopefully, you found this guide Tutorial useful, if you have not read my other cloud series articles be sure to check them out below:
- How to set up Amazon Cloud/AWS Elastic Beanstalk on the NetBeans IDE
- How to use the Microsoft Azure Cloud on the NetBeans IDE
If you want to try running Java Software on the Amazon Cloud you can try following these handy tutorials
- How to run BuildVu Converter on the Amazon Cloud
- How to run the JPedal PDF to Image Converter on the Amazon Cloud
- How to run the JPedal PDF to Image Converter on the Azure Cloud
Our software libraries allow you to
| Convert PDF to HTML in Java |
| Convert PDF Forms to HTML5 in Java |
| Convert PDF Documents to an image in Java |
| Work with PDF Documents in Java |
| Read and Write AVIF, HEIC, WEBP and other image formats |
hi
thanks for this great info
i really like the amazon website , but the proplem with amazon that it doesnot accept paypla payment so any method so i can use my paypal to buy from amazon like ebay ?
thanks again
Hi,
Glad you found the tutorial useful. I’m sorry to say I didn’t explore any other payment methods.
Kind regards,
Georgia
if ( guide_helped == yes ) {
System.out.println (” Nice and well explained, I got my setup going in no time.”);
app running.
:::Nice and well explained, I got my setup going in no time.
Just had to say THANK YOU!
Fabulous, concise and complete!
Just had to share… Oracle seems to be slowly pushing JDeveloper ABOVE NetBeans.
I am trying to accomplish what you have shared here, but with JDeveloper.
Anyone have a link to a similar tutorial but for JDeveloper IDE?
I am posing a link to this instructional post regarding NetBeans on JDeveloper Forum as an example of excellence, hoping to locate SAME for JDeveloper.
Hi,
I m getting the below error :
Cannot connect to Amazon Beanstalk using provided credentials.
I have rechecked the credentials , any hint ??
BR,
M S Khan
Hi,
Sorry to say I didn’t encounter that error.
Might be worth checking your user has been assigned the correct policy to give them the necessary permissions to connect with the environment. You could also try creating a new set of credentials and try connecting with them.
Kind regards,
Georgia