In this article, I will be talking about NetBeans Version Control Feature with Mercurial Support.
Version control is one/if not my favourite feature in NetBeans, I honestly do not know how I have ever managed to cope without it prior to my job at IDRSolutions
What is Version Control?
Here at IDRSolutions, we are all using NetBeans on our machines, and we have chosen to use Mercurial for our version control. Mercurial is a project management tool that allows us to keep various versions of the project which is being worked on. Because we are all working on the same project (The JavaFX PDF Viewer), it is important that we use version control. Version control allows each member of the team to work on the same project at once (it would be a little bit silly if only one person could work on a project at a time… wouldn’t it?). When any one of us have made any changes to the project we commit our version of the project to the repository (the place where all of our code is kept) which then makes it available to be pulled to each of our personal machines so we all have the same version and the same code.
You don’t need to been in a team to use Mercurial:
You really don’t need to be part of a team to use version control, it is a good way to make sure that you have regular backups of your work stored, and if for any reason there is ever a problem you can always revert back to a working Version of your code.
Integrating version control with NetBeans
NetBeans currently supports 5 versioning systems: Git, Mercurial, Subversion, CVS and ClearCase. Git, Mercurial and Subversion are all bundled in with the IDE and you can use them right out-of-the-box. However CVS and ClearCase are easily installed too, you can do this by going to the plugin manager.
NetBeans really couldn’t make it any easier to integrate version control into your working project.
Once you have set up your version control in NetBeans you are able to use the functions such as the following:
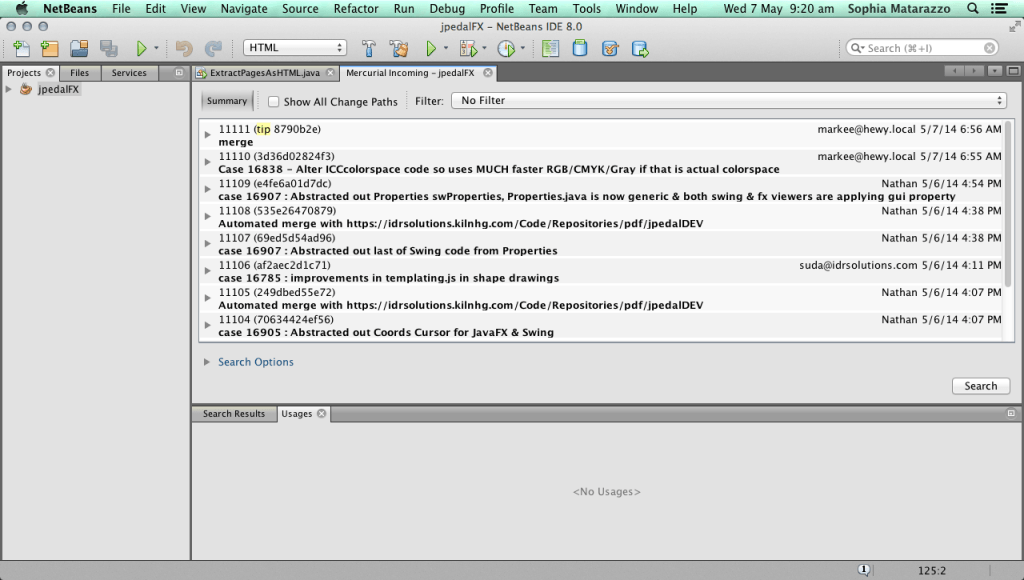
1) View Incomings and Outgoings of the Queue
With this feature it allows you to view the incoming and outgoing changes that are in the queue.
This is a nice feature to be able to quickly pull certain things from the queue, for example, if you have asked someone to fix an issue, you can then continue with your own work and pull the new code from the queue when the issue is resolved.
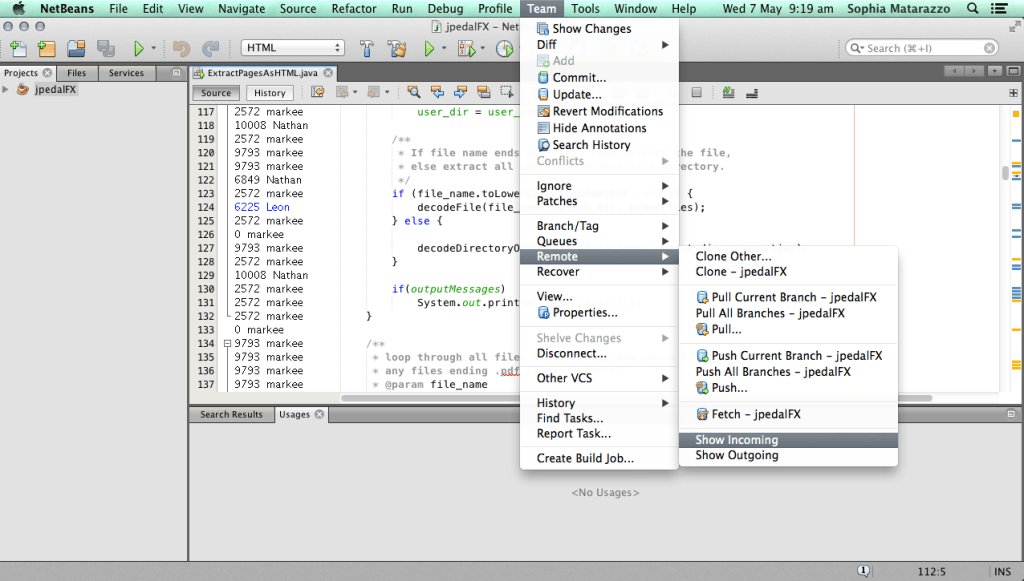
Team > Remote> Show Incoming/Outgoing
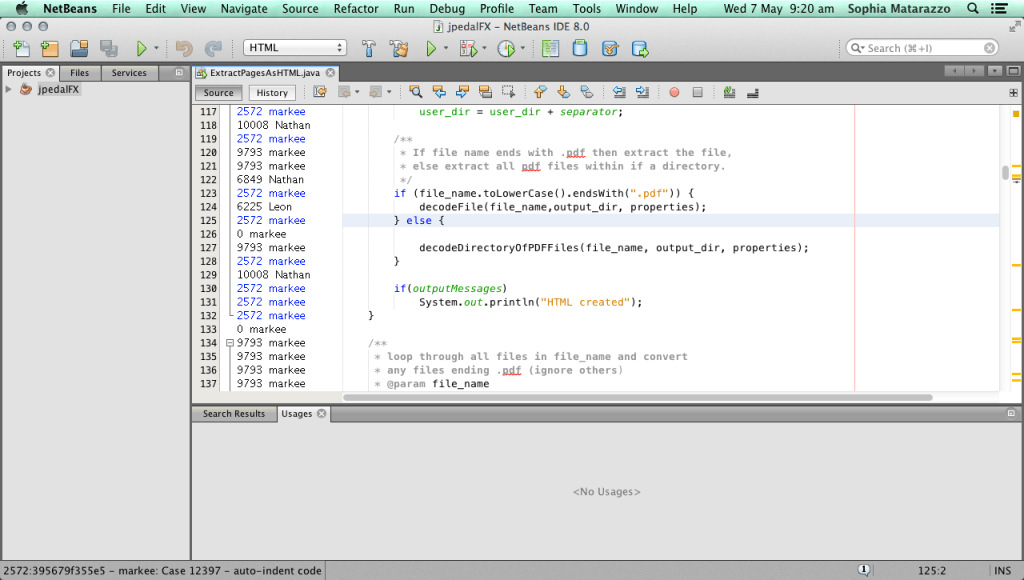
2) See Who Changed What and When
This feature has both its pros and cons. You can view the person who changed each line of code, brilliant if you need to get some advice on what’s going on or need to chase someone up on a piece of code but on the other hand if you’re prone to submitting bugs then prepare to be pestered!
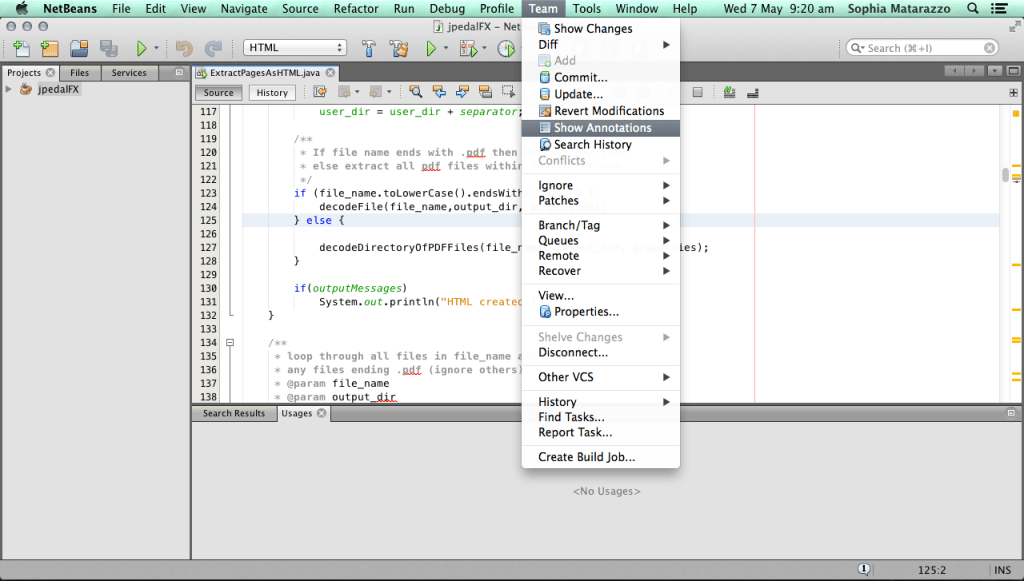
Team > Show Annotations
3) Shortcut Buttons
NetBeans have really thought about their users by making sure their IDE is simple to use, which means that developers can forget about the small stuff and get stuck in with development. When you are using version control you don’t want to have to mess about finding ways to submit your code to the repository, so NetBeans have given the option to customise your tool-bar.
I have customised my toolbar so that I can:
- Show the differences between my new code and my old code – This allows me to see what I have changed and delete anything that isn’t relevant.
- Commit my work – this shows me the files that are being submitted to the repository.
- Fetch – This allows me to fetch any changes to the code that have been made and add my new code to the changes.
- Push – This then allows me to push my work straight to the repository.

4) Preview code that has been added or changed
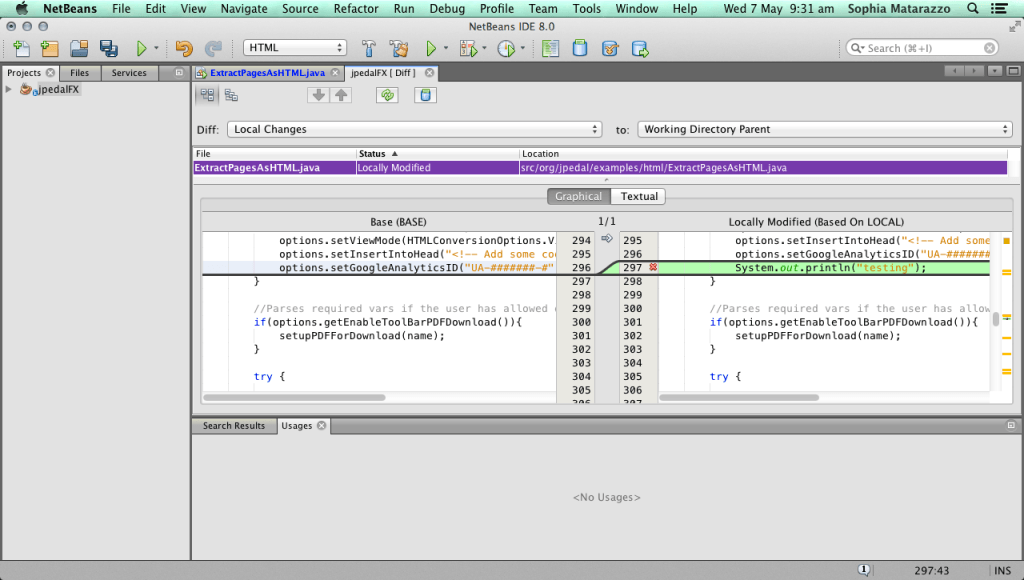
Another feature that I find really useful is the ability to view the new changes in code that I have written. Again, thanks to NetBeans thinking of their users you can do this by the click of a button if you have set your toolbar up like mine. I find this feature to be really useful for checking what code you have written and making sure that it is not only correct but you can also easily check you have removed any unwanted debug code or unwanted code.
| Blue | Indicates lines that have been changed since the earlier patch. |
| Green | Indicates lines that have been added since the earlier patch. |
| Red | Indicates lines that have been removed since the earlier patch |
5) Viewing File Status Information
When code has been changed in the project it indicates it clearly in the Projects bar, You will see that the class name changes to Blue, this is a nice indication to keep track of the changes that you are making to the project.

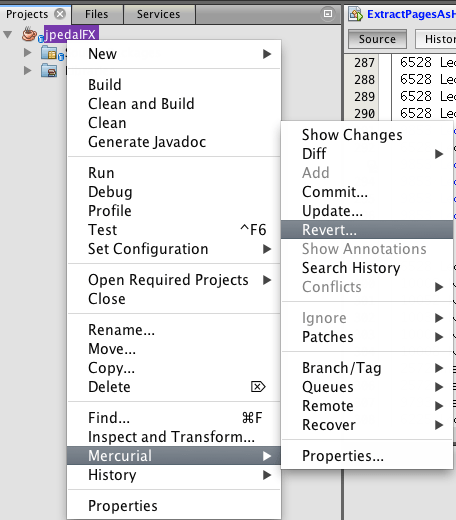
6) Revert back to old code
If you have made any changes when you have been trying to get something to work, we have all been there when we fix one thing and continue to try and fix other issues, well with version control in NetBeans you can always revert your code back to the last time that you had it fully functioning.
I hope that this article has given you a good insight into NetBeans IDE and Mercurial Versioning Control.
What type of Version control do you use? What are your favourite features of version control in NetBeans? Let me know in the comments below.
This post is part of our “NetBeans article Index” series. In these articles, we aim to explore NetBeans in different ways, from useful hints and tips to our how-to’s, experiences and usage of the NetBeans IDE.
Our software libraries allow you to
| Convert PDF files to HTML |
| Use PDF Forms in a web browser |
| Convert PDF Documents to an image |
| Work with PDF Documents in Java |
| Read and write HEIC and other Image formats in Java |