
Whilst busy working away on various software at IDR Solutions it occurred to me that it hass been a while since I wrote another cloud article, so I bet you can guess what time it is.
Recently I have been playing around with Red Hat’s OpenShift Paas cloud. Best thing about this cloud? There is no 30 day free trial where you have to enter your card details and pray it doesn’t charge your account once the trial is up. You get allocated a small amount of resources and have the ability to create up to 3 web applications or gears as they are called on this cloud with 1GB storage each, making it perfect for you to explore and learn the ropes without feeling too rushed. You can learn more about the free plan here.
Last time I wrote about ‘How to use the Layershift Jelastic Cloud with the NetBeans IDE‘. This time I will show you how to to create a web application, test it locally and then deploy the application to the OpenShift cloud through NetBeans. I use a Windows system so some commands or steps may differ slightly for other operating systems.
What you will need before you start:
- – Git installed and setup. You can check if you have git installed using git –version which will return your current git version if it exists.

- – Tomcat 7 Server installed locally and added to your NetBeans IDE – if you haven’t got this then I have explained how to carry this out in Step 5 and 6 of my Layershift cloud tutorial
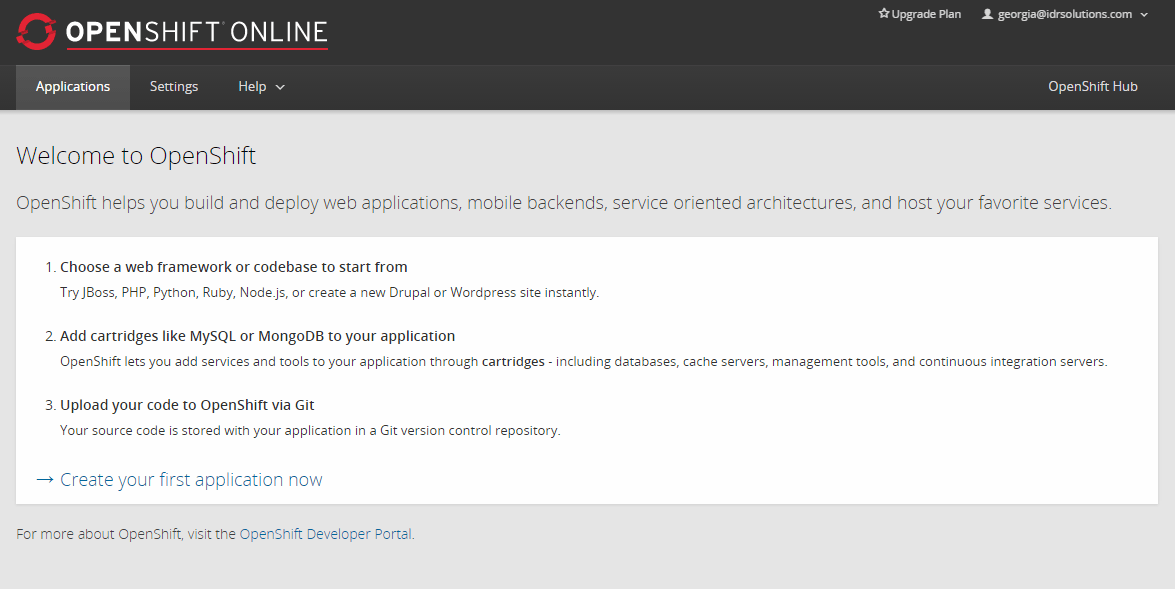
1. Sign up to an OpenShift account
Like I said before no credit cards are needed. Just pop your details into this OpenShift registration form and you will receive an email confirmation of your sign up. Now you will have access to your OpenShift Web Console where you can create and view applications. There are two ways to create applications. You could either create an application in the web console (where you can view all of your different options) or you can create one using the rhc command line tool if you already know which server you want. We will be carrying out the latter.
2. Download ruby
The rhc command line tool can be installed through Ruby and the easiest way to download Ruby is using the appropriate installer. I am using a windows system for this tutorial so please bear in mind that some of the commands may be different depending on your operating system, but in that case you can follow OpenShift’s own tutorial to download the rhc tools as it caters for different operating systems.
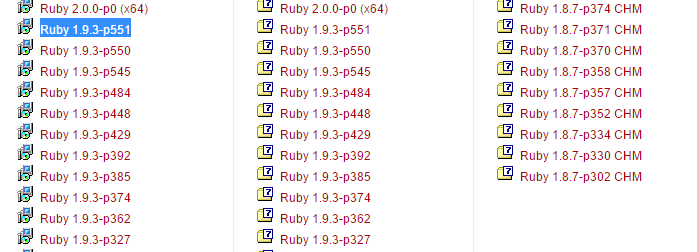
You can get the ruby installer from here. Make sure you get the Ruby 1.9.3 version as later versions do not work and will only bring you insurmountable grief.
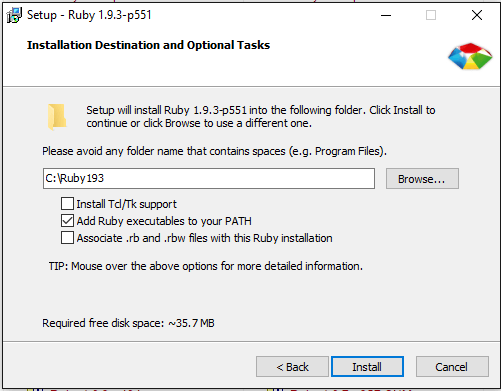
When the installer is executing accept the licensing agreement and make sure the “Add Ruby executable to PATH” check box is selected, so that you can access Ruby quickly and easily from the command prompt. Finally click install.
You can check that Ruby was installed properly using ruby -v command. Just as a reminder, the Windows command prompt cannot detect changes to your Environmental Variables when it is open so make sure your close any open instances of command prompt and re-open to test this command. If this does not work then Ruby wasn’t installed correctly and you will have to try again.
![]()
3. Download rhs client tools
Now that we have Ruby installed we can use the Windows command prompt to download the client tools with the command gem install rhc.
Once this has completed you need to run rhc setup. This command will connect your system to your web console and it will also generate an authorization token that will be used to authenticate your system to your web console. You also need this token when you want to clone your git repository to NetBeans.
Press enter when prompted for the server hostname, then enter your username and password that you used to sign up for your OpenShift account.
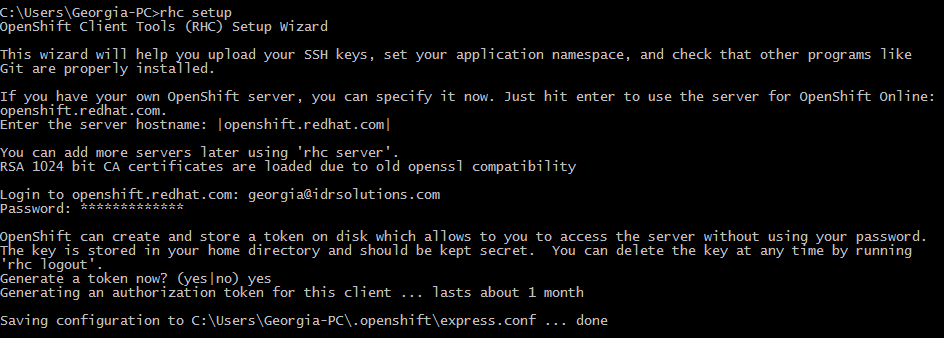
When asked if you want to upload a public ssh key enter yes. This will generate a new key for your system which by default will be named id_rsa.pub and will be stored in C:\Users\yourUserName\.ssh

4. Create a domain
A domain is where we will store our applications. You can create a domain using: rhc domain create domainName. I have called my domain idrsolutions.

5. Create an application
We want to create a Tomcat 7 application so we need to use rhc app-create testApp tomcat7 which will generate something similar to the below code. I have highlighted two bits of information that you should take an interest in. The first one is the URL where your application will be hosted. There is also the GIT remote ssh which you will use to clone, push, pull, etc your code for this application.
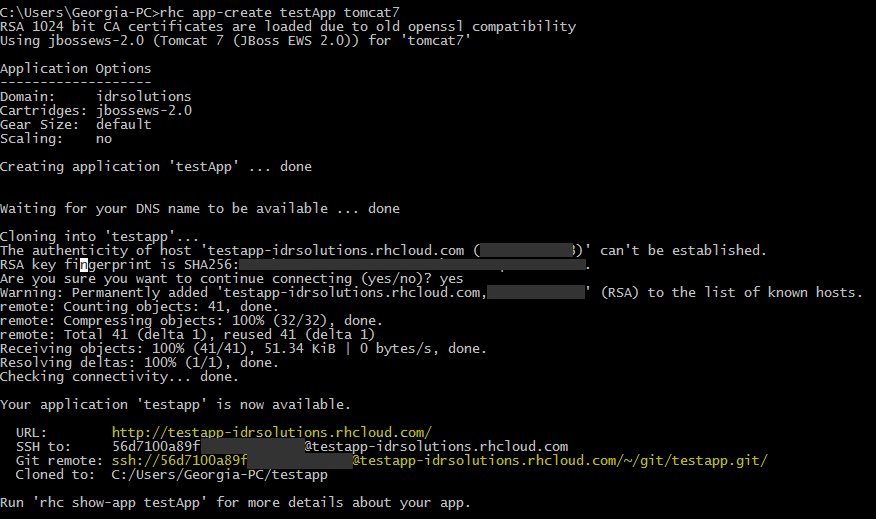 You can get this information in your web console too. Just go to Applications and select your app.

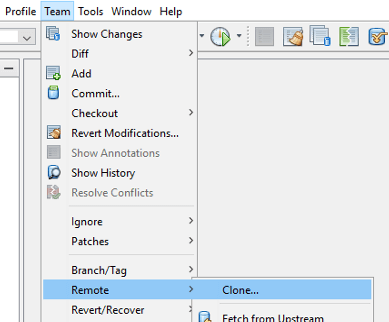
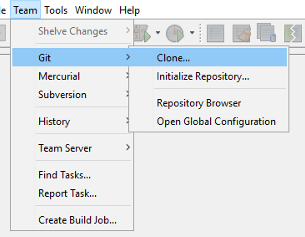
6. Clone the application to NetBeans
Now that we have the application created we can clone the project into NetBeans. The menu’s in NetBeans are context sensitive so the clone menu item could be in either in Team -> Remote -> Clone or Team -> Git -> Clone
Then you need to enter your ssh into the Repository URL section. NetBeans should then detect your username is part of the ssh you entered and cut and paste that section into the username bit.
In case NetBeans doesn’t pick this action up here is an example ssh, username and repository URL:
SSH: ssh://4386ggfnjdwtgbtrdvbet434@testapp2-idrsolutions.rhcloud.com/~/git/testapp2.git/
Username: 4386ggfnjdwtgbtrdvbet434
URL: ssh://testapp2-idrsolutions.rhcloud.com/~/git/testapp2.git/
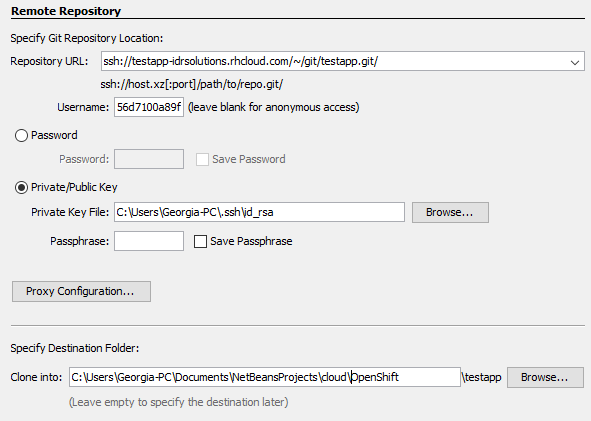
Then set the private key to the key we created earlier to C:\Users\yourUserName\.ssh\id_rsa
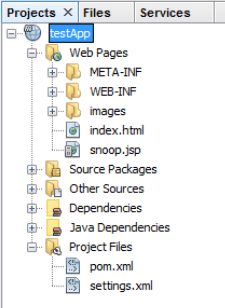
Finally click Next, Next and Finish and your application should be pulled. You will have to open it from where you saved the project. Your projects should look like this:
7. Edit the application
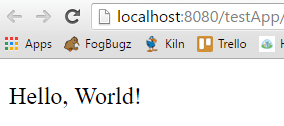
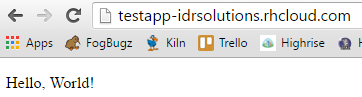
We are going to change the index.html file so that it displays the customary Hello, World! that everybody knows and loves. So open that file and change the contents to:
<!doctype html>
<html>
<body>
<p>Hello, World!<p>
</body>
</html>
Now that we have edited the application we want to make sure it works locally. Right click your top most project node (testApp) and select Run. You will be asked to select your deployment server. A prerequisite of this tutorial was to have your Tomcat server set up and running in NetBeans so you can just select that instance. Then select Remember Permanently so you do not have to repeat this step. Click OK and you should receive a page like this:
8. Push your changes
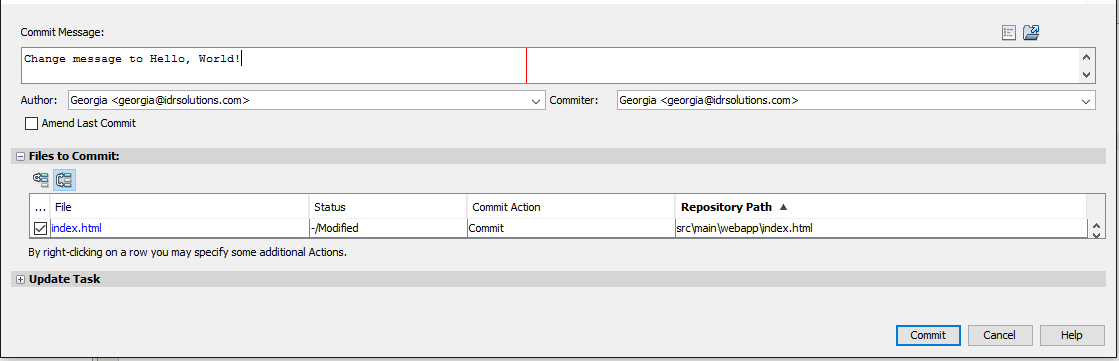
Now that we have edited the application and confirmed that it works locally, we can push our change to the cloud. Firstly, right-click your top-most node (testApp) and select Git -> commit. Enter a useful message and click commit.
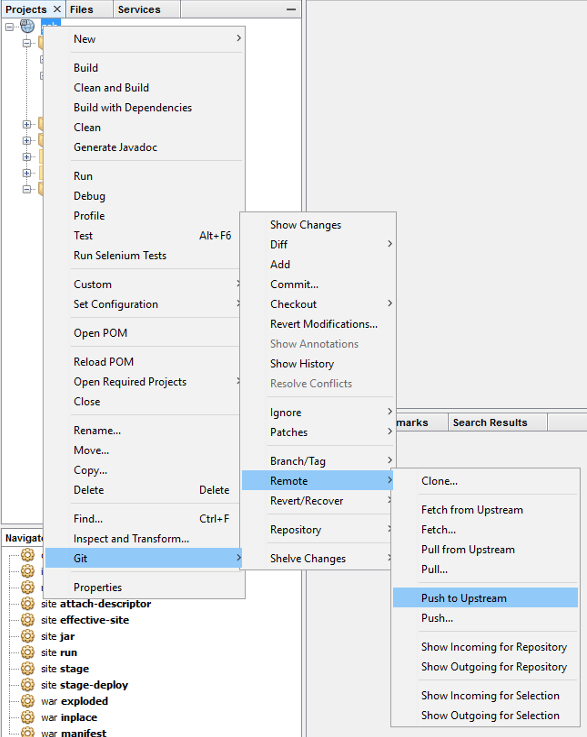
Then you need to push your commit by right-clicking your top-most node (testApp) again and selecting Git -> Remote -> Push to upstream.
9. Open your application in your web browser
Your changes could take a few minutes to be retrieved and processed by the server. The server will show a Building status when it receives changes and a Started status when it is running again.
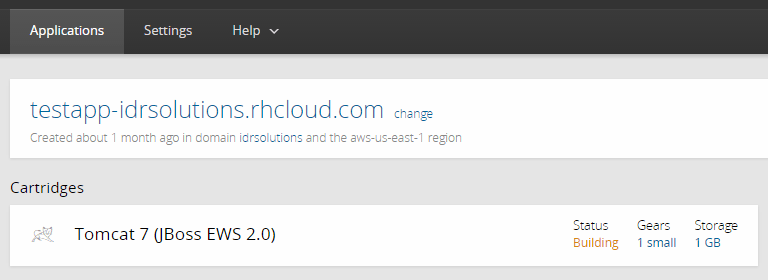
Once the Starting status has been reached you can open your application from the URL e.g. http://testapp-yourDomain.rhcloud.com/
 And there you have it. How to setup and run an applications for the OpenShift cloud using the NetBeans IDE.
Our software libraries allow you to
| Convert PDF to HTML in Java |
| Convert PDF Forms to HTML5 in Java |
| Convert PDF Documents to an image in Java |
| Work with PDF Documents in Java |
| Read and Write AVIF, HEIC, WEBP and other image formats |
Hello,
I’ve created the app in openshift itself, and dont have any private key.
Now netbeans is not accepting the openshift passoword, what to do?