At IDR Solutions I mainly work on the Development of the JPedal Java PDF Library and PDF to HTML5 Converter. Recently I have also spent a lot of time studying the cloud and thought it might be useful to create some guides on how to use various cloud platforms with the NetBeans IDE.
Last time I wrote about ‘How to use the Oracle cloud on the NetBeans IDE‘, this time I will show you how to to create a web application, test it locally and then deploy the application to the Jelastic cloud through NetBeans. I use a Windows system so some commands or steps may slightly differ for other operating systems.
What you will need before you start:
- – Java 8 JDK installed. Make sure you set the JDK 8 as your JAVA_HOME environment variable. On Windows you can do this by going to your control panel, System and selecting Advanced System Settings. From there select Environmental Variables and click the New button in the System Variable section. Then enter JAVA_HOME for the variable and the path to our Java 8 JDK folder. If you have C:\ProgramData\Oracle\Java\javapath in your path, then this could potentially cause you problems as it may reference a JRE (Java Runtime Environment). I deleted this from my path but if you do not wish to do this then just navigate to your JDK directory when and run any Java commands.
- – NetBeans IDE
1. Sign up to a free Jelastic Paas trial
You can do this by heading to: http://www.layershift.com/jelastic and all you need to do is enter your email address. The trial is for 14 days and offers you the free use of 4 development environments, where each environment is a group of servers (Tomcat, Apache or Glassfish) with up to two load balancers per environment). Other functionality like Public IP addresses and custom SSL is restricted to paid accounts only.
Once you have signed up to a free trial you should receive an email with your trial login details. You can access your development console at: https://app.j.layershift.co.uk/
2. Create a Development Environment
Once you log into the console you will be greeted by a screen like this:
You need to create a development environment because that is the group of servers we will deploy our application(s) to from NetBeans. You can have an environment for one application or a group of them. We will be making a Tomcat 8 environment for our application to run on.
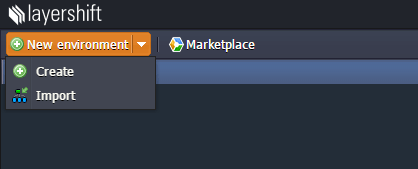
Firstly, select New Environment in the top-left corner and select Create.
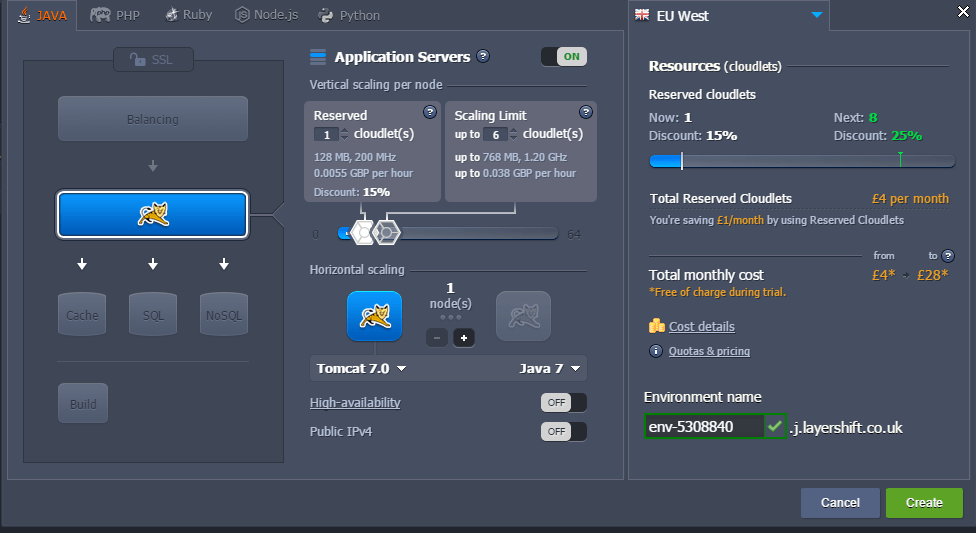
This will open a window where you can configure your environment. By default the Java environment tab opens up and a Tomcat server is selected.
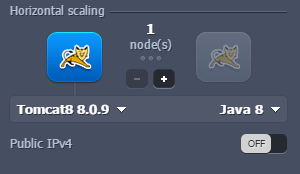
I’m going to use Tomcat 8 and Java 8 locally so I will change these settings so that my remote server matches my local environment. To do this just select your Tomcat and Java version in the Horizontal Scaling section and choose which options you need.
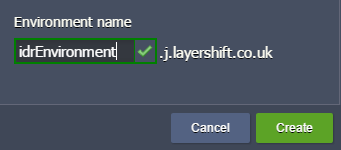
You can optionally change your default environment name.
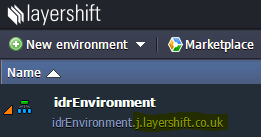
* Please make a note of your domain here (mine is j.layershift.co.uk).
We will need this later when we connect NetBeans to your cloud account. *
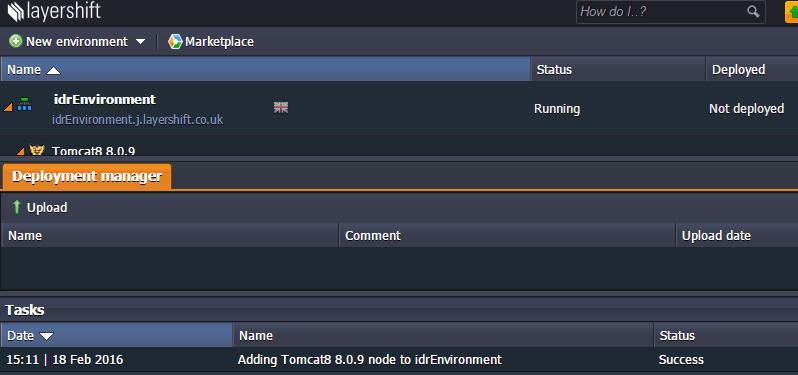
Click Create and you will see a success message in the Tasks section once your environment is ready to be deployed to.
3. Add the Jelastic Plugin to the NetBeans IDE
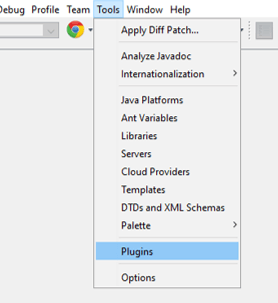
The Jelastic plugin is available to install in NetBean’s plugin manager. You can open the plugin manager by going to the Tools menu at the top and selecting Plugins.
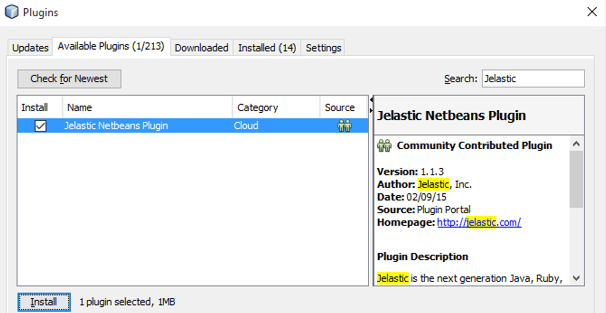
Once the plugin manager is open go to the Available Plugins tab. From there type “Jelastic” in the search box on the right. Tick the checkbox for that plugin and click Install at the bottom.
When the Plugin Installer wizard comes up click Next, accept the License agreement and click Install.
4. Connect NetBeans to your Jelastic cloud
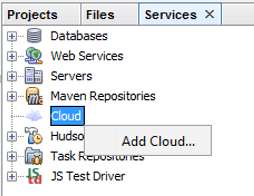
To deploy to the cloud directly we need to link our NetBeans instance to our Jelastic cloud account. To do this go to your Services tab and right click your Cloud node and select Add Cloud.
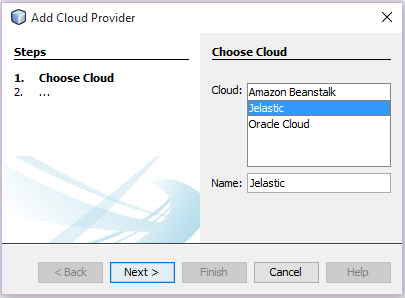
Select Jelastic for the cloud type and click Next.
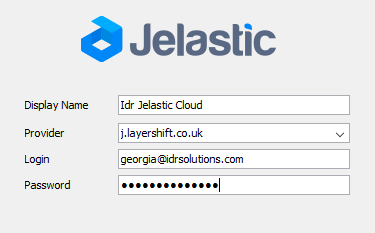
On the next screen the Display Name will help you identify you cloud if you have multiple accounts. Provider should be the domain of your account. You can find it by looking at your console URL or by looking at your created environment from earlier.
Your Login and Password should be the same as your Jelastic cloud account credentials.
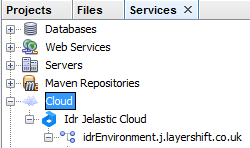
Click Finish and you should see the environment we created earlier under your Cloud node.
5. Create a local Tomcat server to test applications
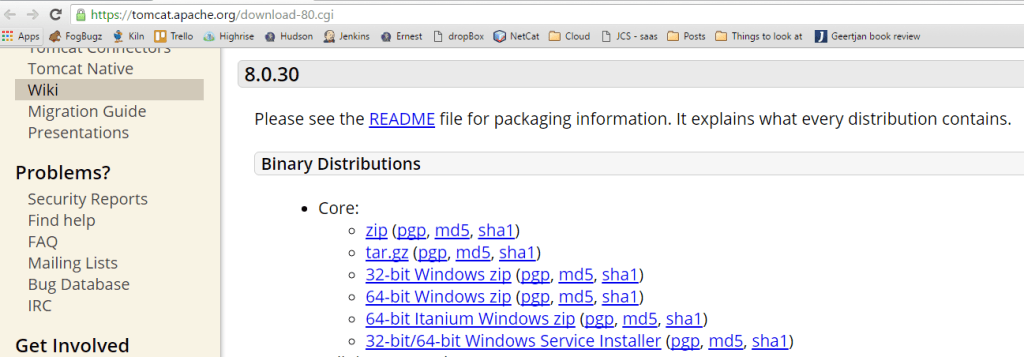
Before deploying a web application to your cloud server it is always a good idea to test your application locally. We are going to create a local Tomcat server for this purpose, so you need to download the relevant binary distribution core zip of Apache Tomcat 8.
Extract the contents from your downloaded zip and save in your Program Files directory or optionally in another directory. I have a directory called ‘Apache Software Foundation’ which I can use to store different versions of Tomcat servers if I need them.
To make sure we have the correct permissions, right-click your top-most Tomcat folder in the Program Files directory and select properties. In the properties window go to the Security tab. Then select your user account name and make sure all of your permissions are set to Allow. If they aren’t go to Edit and tick them and click OK. If these aren’t set then Tomcat may not run correctly.
6. Add the Tomcat server to NetBeans
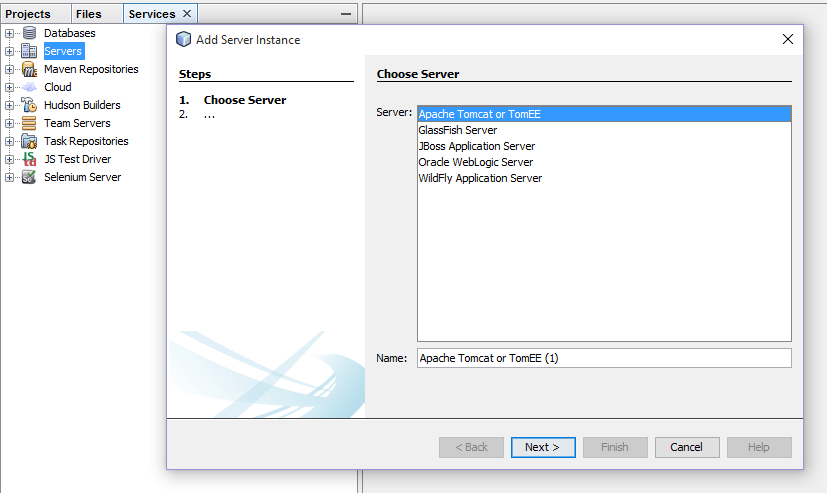
Once you have opened NetBeans go to your Services window. Then right click on your Servers node and select Add Server. When prompted select Apache Tomcat or TomEE as your server. Optionally you can name this server at the bottom. Click Next.
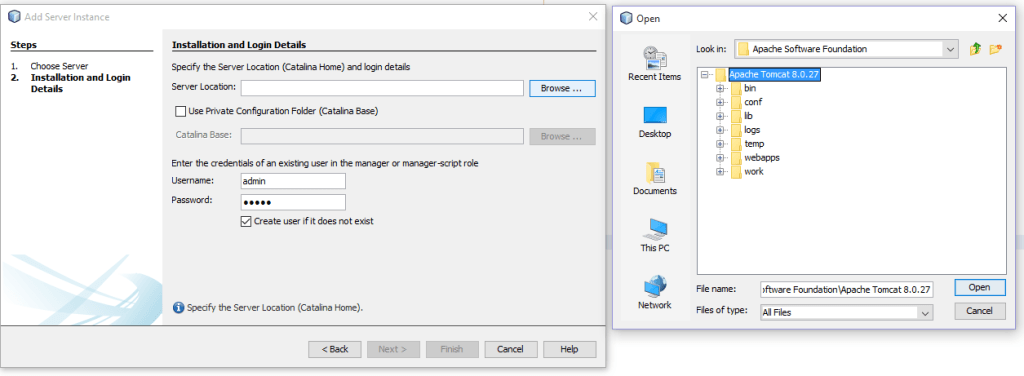
Server location should be the folder containing all of your Tomcat files including the bin, conf and lib folders. Next you need to create yourself a user account for this server so that you are allocated permissions that allow you to run. deploy projects, etc. To do this you add a username and password and leave Create user if it does not exist ticked which will create the account for you. Click Finish.
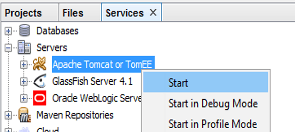
Now you have created a Tomcat server instance that appears under the Servers node. Right click your server and select Start.
On some Windows systems running Tomcat may give you a “127.0.0.1 is not recognized as an internal or external command error”. To fix this you need to go to C:\yourServerLocation\bin\catalina.bat and you need to edit this file so open it up in a text editor. Search for the below two snippets and remove the speech-marks.
:noJuliConfig
"JAVA_OPTS=%JAVA_OPTS% %LOGGING_CONFIG%"

:noJuliManager
"JAVA_OPTS=%JAVA_OPTS% %LOGGING_MANAGER%"
Now save your changes. If you change any configuration files on your server then you have to recreate the server instance that you just created on NetBeans, otherwise the new changes will not be implemented. You will have to restart this step again in that case.
Another common error is that NetBeans may not create your server login details correctly. To check this has been carried out correctly, open this file in a text editor: C:\yourServerLocation\conf\tomcat-users.xml. If this is not set correctly, then when you go to deploy an application locally, it will not accept the login credentials you provide. You should edit your tomcat-users section of this file to resemble this:
<tomcat-users xmlns="http://tomcat.apache.org/xml" xmlns:xsi="http://www.w3.org/2001/XMLSchema-instance" version="1.0" xsi:schemaLocation="http://tomcat.apache.org/xml tomcat-users.xsd">
    <role rolename="manager-gui"/>
    <user password="yourPassword" roles="manager-gui,manager-script,admin" username="yourUserName"/>
</tomcat-users>
Again you need to delete your server instance and add it to NetBeans again and start the server.
One more issue may be if you want to run Tomcat when another process is running on port 8080. You can change this port in your C:\yourServerLocation\conf\server.xml file. Just search for 8080 and change every instance to a different port number e.g. 8085.
7. Create a Web Application
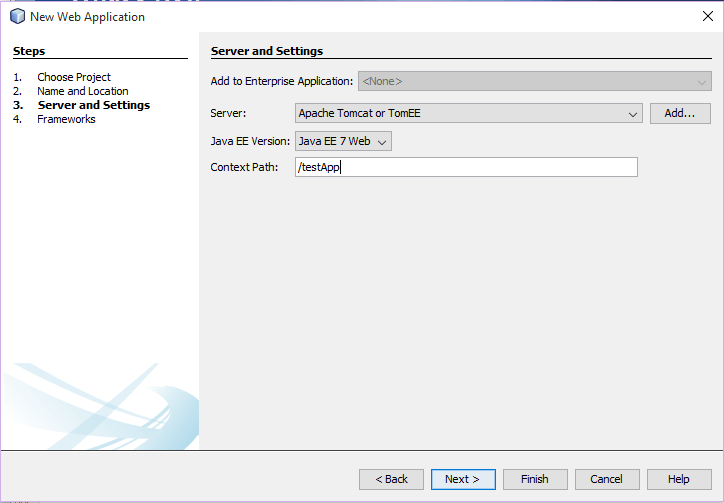
To create a web application go to the Projects window, right click and select Create New Project. Then in the Java Web category select Web Application. On the next screen name your project. When you come to the Server and Settings page set the Server to the Tomcat server we created in the above steps.The latest Java EE version supported is version 7. Click Finish and your project will be created.
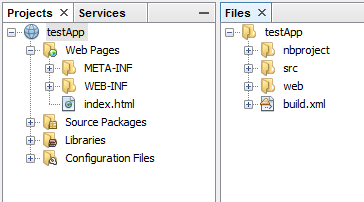
NetBeans has two views to show your web apps files and folders. The Project view will show you the files you will most likely be editing and the Files view will show every file in your project.
8. Test your application locally
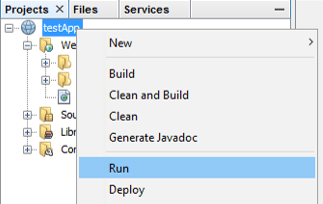
Now that your project and server have been created successfully we can run the application. Select your projects top most node and select Run at the top.
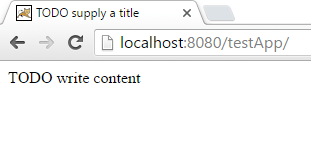
The first time you do this you will be asked to enter your Tomcat servers log-in credentials. After doing that you should have a new tab open in a web browser with your applications default startup page (index.html if you haven’t edited the project). Mine is displayed below.
9. Deploy your application to the Jelastic cloud
Once you have your application working locally, it is time to deploy this application to the cloud. This is fairly simple to do once you have got your Jelastic plugin set up.
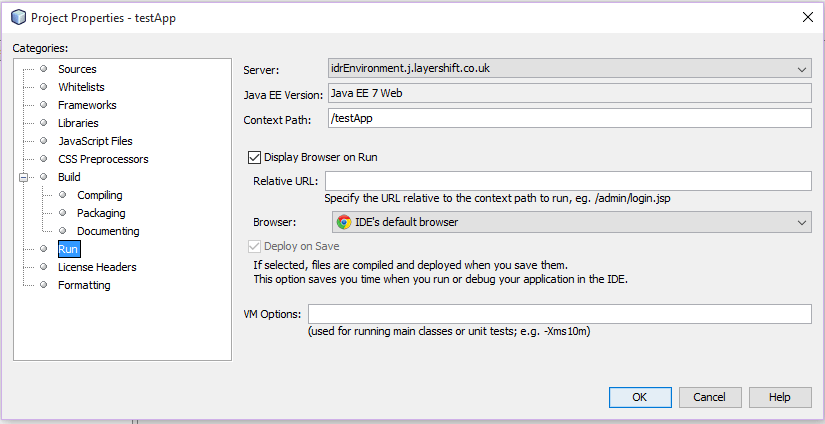
Firstly, you need to right click your applications parent node and select the Properties menu. From there select the Run category and change your Server to the environment we created on the cloud. Click OK.
Then right click your projects parent node and select Deploy. This will upload your web application to your Jelastic cloud.
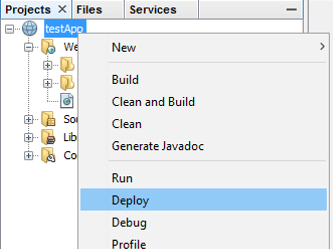
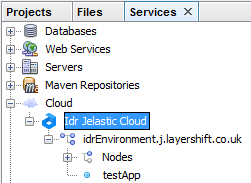
Once your application is uploaded it will appear under your Cloud node in your Services window. You may have to refresh your Jelastic node (Right-clicking and selecting Refresh) for it to appear.
10. Run your application
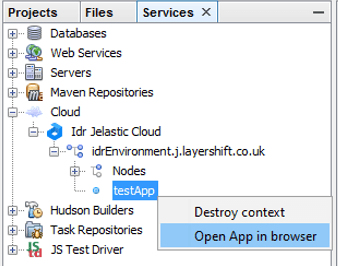
To run your application you need to right click it in your Services window and select Open App in browser.
A new tab should open up displaying your application running on your Tomcat environment on your cloud.
So there you have it. One web application created, tested locally and deployed to the Jelastic cloud from NetBeans.
Our software libraries allow you to
| Convert PDF files to HTML |
| Use PDF Forms in a web browser |
| Convert PDF Documents to an image |
| Work with PDF Documents in Java |
| Read and write HEIC and other Image formats in Java |





This materials is very helpful. Thanks in tons alot