At IDRSolutions, our PDF Viewer (part of our JPedal Library) currently uses Java Swing to create the PDF Viewer interface. However, we are now in the process of developing a JavaFX PDF Viewer, this involves mimicking our Swing PDF Viewer and producing the same Graphical Interface but with JavaFX 2.2 instead.
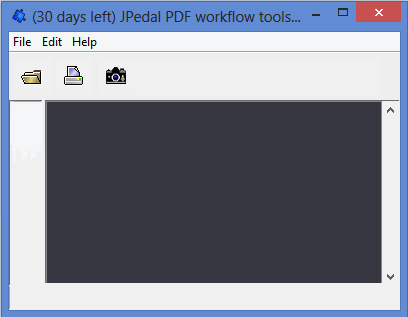
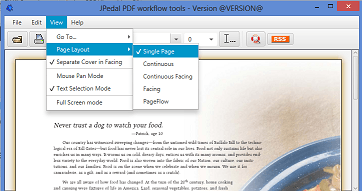
Previously, I wrote a tutorial on Creating a Glowing Border Effect in JavaFX which can be applied to any Node. In this tutorial, I will be demonstrating how to produce a stacked Menu with File, Edit and Help options with a ToolBar sitting underneath, bellow is an example of the stacked menu in Swing. However by the end of this tutorial we will have a JavaFX equivalent.
I am assuming people reading this article have a basic knowledge of how to set-up a Stage and BorderPane in JavaFX, if not then please see here, the top BorderPane is what we’ll be adding our MenuBar and ToolBar to.
Design your Stacked Menu Layout
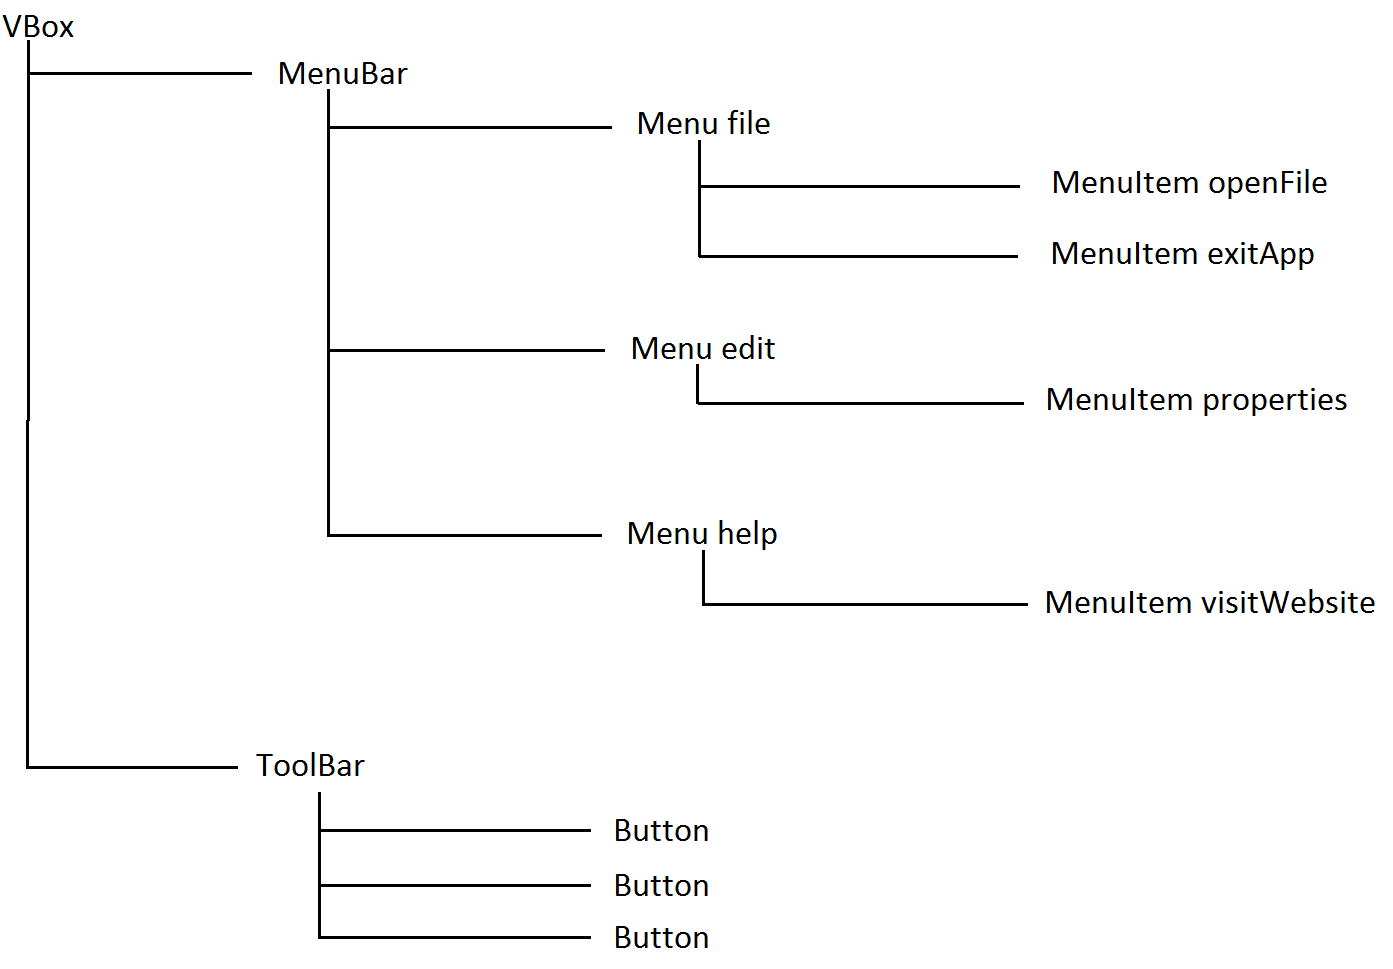
I cannot emphasise the importance of planning and getting the hierarchy of your menu layout correct. If you do not plan your menu design then you may neglect efficient ways to structure your Menu and it may end up unmaintainable/messy (this is especially true when you extend this tutorial for more complex menus). Please see the picture bellow for an example of how we’re going to structure our Menus hierarchy in this tutorial.
Coding the Hierarchy
Setting up the VBox
Looking at our design, the first thing we’re going to want to create is a VBox to hold our MenuBar and ToolBar Objects. Todo this we write the following code :
BorderPane root = new BorderPane();
VBox topContainer = new VBox();  //Creates a container to hold all Menu Objects.
MenuBar mainMenu = new MenuBar();  //Creates our main menu to hold our Sub-Menus.
ToolBar toolBar = new ToolBar();  //Creates our tool-bar to hold the buttons.
Add Menus to the Top Container (VBox)
We now want to add our mainMenu and toolBar object to our topContainer which in turn will be added to the top border of our BorderPane object using the setTop() method.
topContainer.getChildren().add(mainMenu);
topContainer.getChildren().add(toolBar);

root.setTop(topContainer);
Add Items to the Main Menu
Now we have created and added our main menu and tool-bar objects to the top container we can start to populate our main menu with some sub-menus and options. First we will add our File, Edit and Help sub-menus.
//Declare sub-menus and add to main menu.
Menu file = new Menu("File");
Menu edit = new Menu("Edit");
Menu help = new Menu("Help");

mainMenu.getMenus().addAll(file, edit, help);
We have now created and added some sub-menu options to our main menu. However our main menu is not yet complete, looking at our design we still need some selectable options from our sub-menus, so lets go ahead and code those in.
//Create and add the "File" sub-menu options.
Menu file = new Menu("File");
MenuItem openFile = new MenuItem("Open File");
MenuItem exitApp = new MenuItem("Exit");
file.getItems().addAll(openFile,exitApp);
//Create and add the "Edit" sub-menu options.
Menu edit = new Menu("Edit");
MenuItem properties = new MenuItem("Properties");
edit.getItems().add(properties);
//Create and add the "Help" sub-menu options.
Menu help = new Menu("Help");
MenuItem visitWebsite = new MenuItem("Visit Website");
help.getItems().add(visitWebsite);
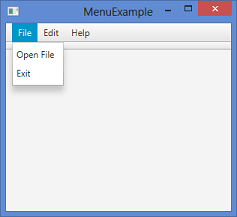
mainMenu.getMenus().addAll(file, edit, help);We should now see something like the picture bellow :
Add Buttons to the ToolBar.
Now we have added our tool-bar to our top container and added all of that to the top border-pane we have our basic setup of the tool-bar complete. We can now code in some buttons for our tool-bar.
Button openFileBtn = new Button();
Button snapshotBtn = new Button();
Button printBtn = new Button();

toolBar.getItems().addAll(openFileBtn, printBtn, snapshotBtn);
Add Graphics/Icons to the ToolBar Buttons.
Now we have added some buttons to our tool-bar I think it’s about time we spruce them up a bit, lets give them some nice icons.
//Create some Buttons.
Button openFileBtn = new Button();
Button snapshotBtn = new Button();
Button printBtn = new Button();
//Set the icon/graphic for the ToolBar Buttons.
openFileBtn.setGraphic(new ImageView("/pathToOpenFileBtnIcon.png"));
snapshotBtn.setGraphic(new ImageView("/pathToSnapshotBtnIcon.png"));
printBtn.setGraphic(new ImageView("/pathToPrintBtnIcon.png"));
//Add the Buttons to the ToolBar.
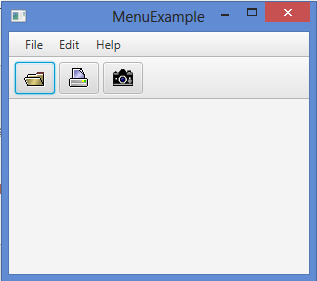
toolBar.getItems().addAll(openFileBtn, printBtn, snapshotBtn);Now that we’ve coded in our Main Menu and added some nice graphics to our ToolBar Buttons our ToolBar is looking good! See what it looks like bellow :
JavaFX End Result
Finally, we have finished our stacked ToolBar! Of course this is just a bare-bones example to get you started. See bellow for a more complex view of what you can achieve :
There’s many creative and surprising things you can do with stacked menus, you may wish to look into using Grids, let your imagination run wild and let us know how you get on by posting bellow!
For the the code/class we have written in this tutorial please see here : StackedMenuExample
Our software libraries allow you to
| Convert PDF to HTML in Java |
| Convert PDF Forms to HTML5 in Java |
| Convert PDF Documents to an image in Java |
| Work with PDF Documents in Java |
| Read and Write AVIF, HEIC, WEBP and other image formats |
One Reply to “Tutorial : How to Create Stacked Menus in JavaFX”
Comments are closed.